Tutorial: Call an external API
Darklang has built-in standard libraries for working with external HTTP Calls
(HTTP and HttpClient). This allows you to work with any external REST APIs.
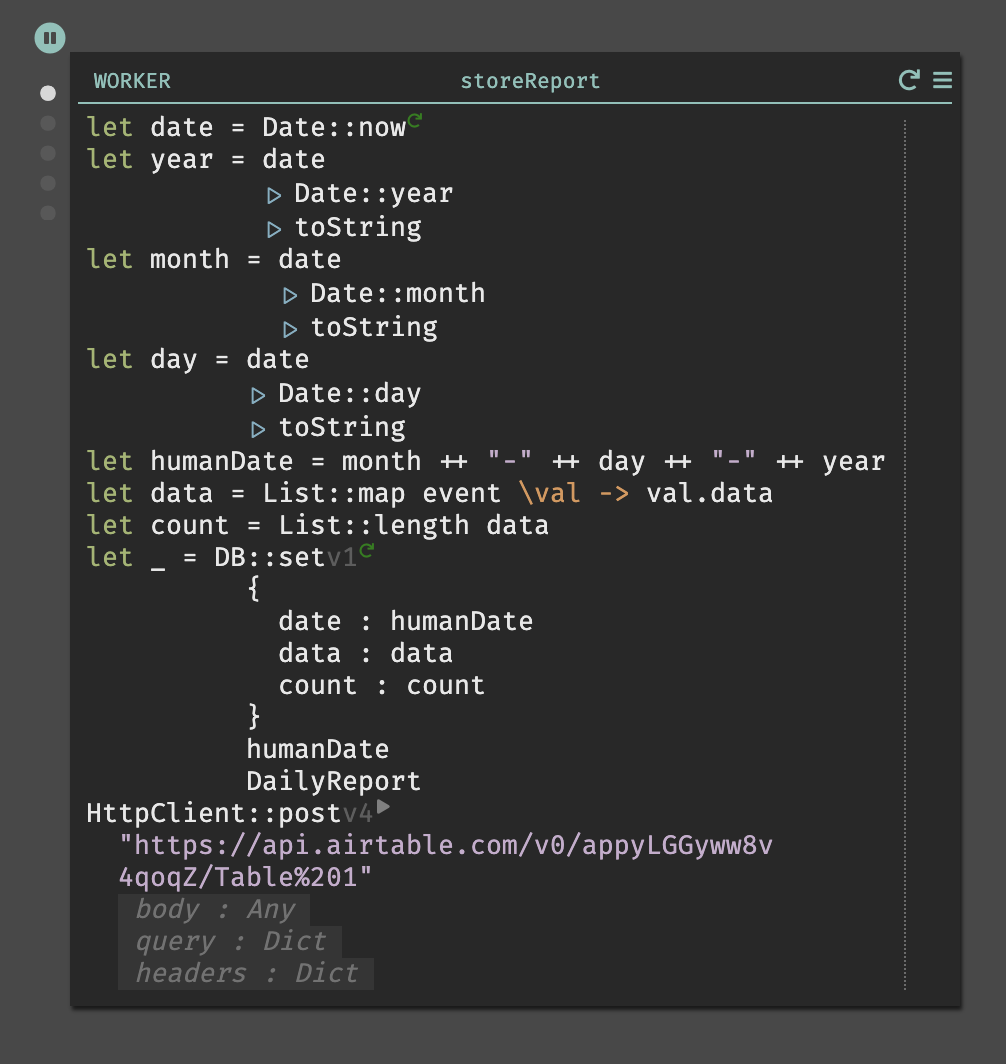
In this Tutorial, we'll send the Daily Report we created to Airtable, so other team members can see it.
If you don't feel like setting up an Airtable account, this step can be safely skipped, and you can continue to the final step.
- Set up Airtable (~10 minutes).
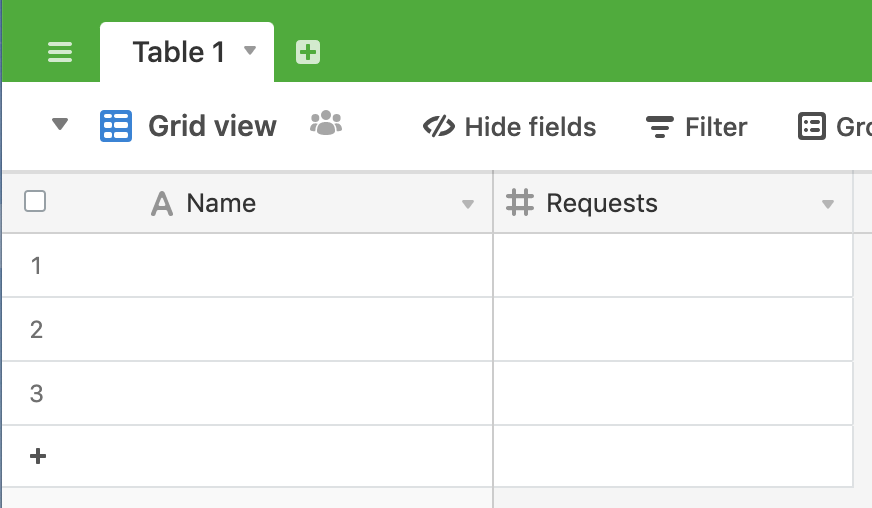
- Go to Airtable and create a new base.
- In the base, create two columns, one for date (field type is date) and one for
requests (field type is number). You can see our sample
here.
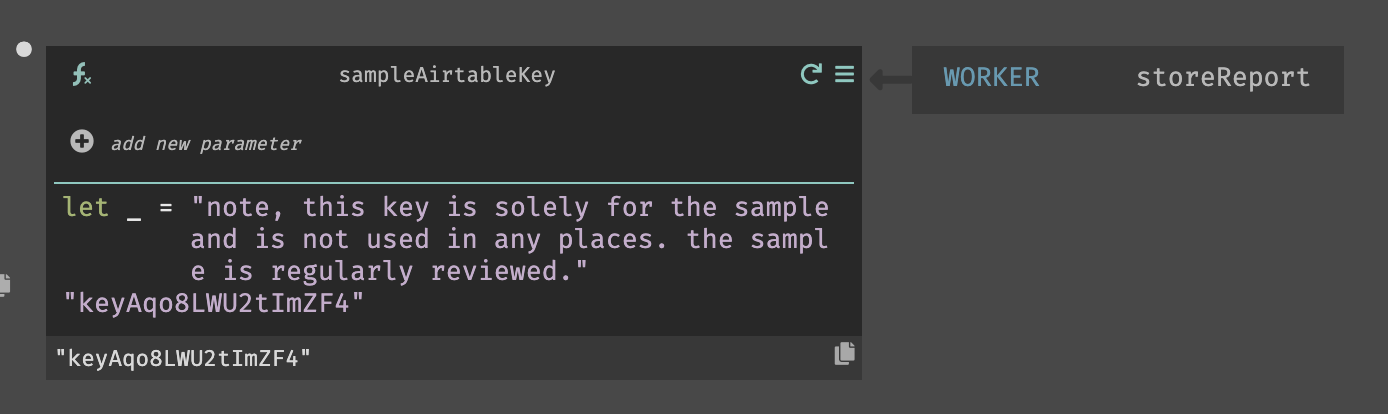
- Generate an API key on the Account page. Put
the API key in a function in your Darklang canvas.
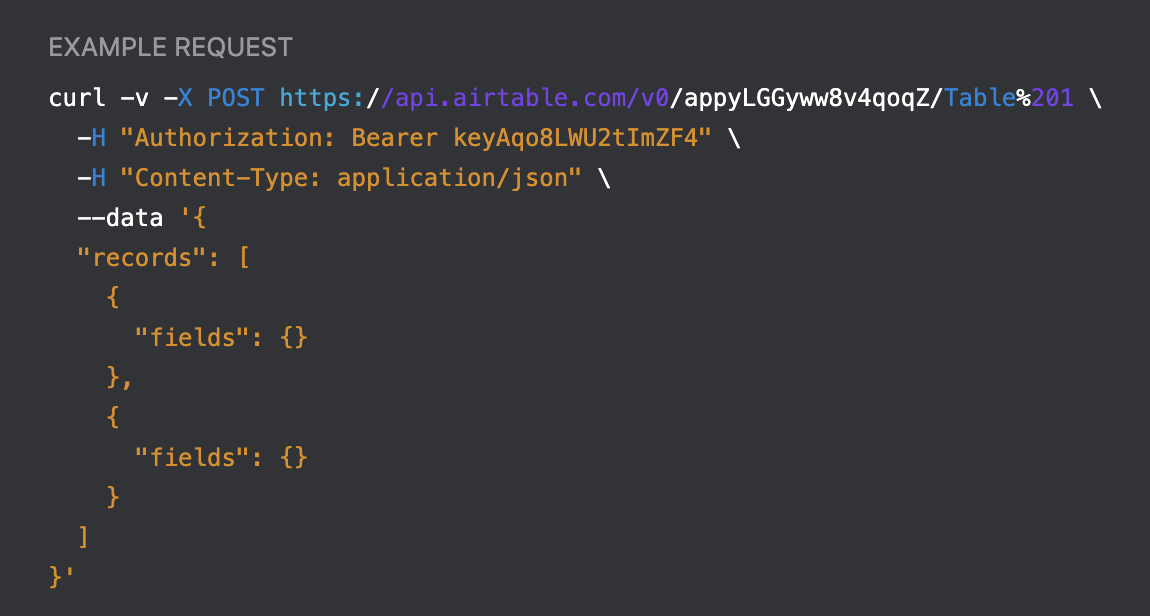
- Airtable's full API documentation for your base will be available on the
API page. Within this page, go to Create Records
in the left hand navigation to copy the URI from the right hand side.
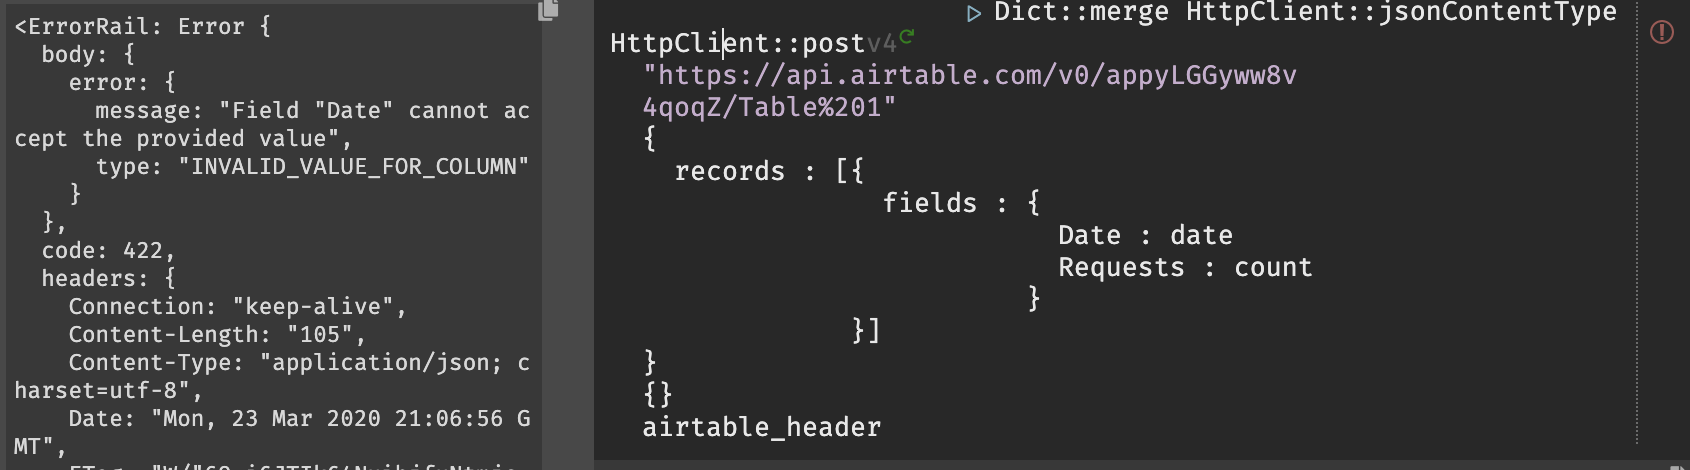
- Add the HTTP POST call to the
storeReportworker so it will run asynchronously. Hitreturnafter theDb::setfunction.DB::setwill still run as a side effect, and we can add the new function.
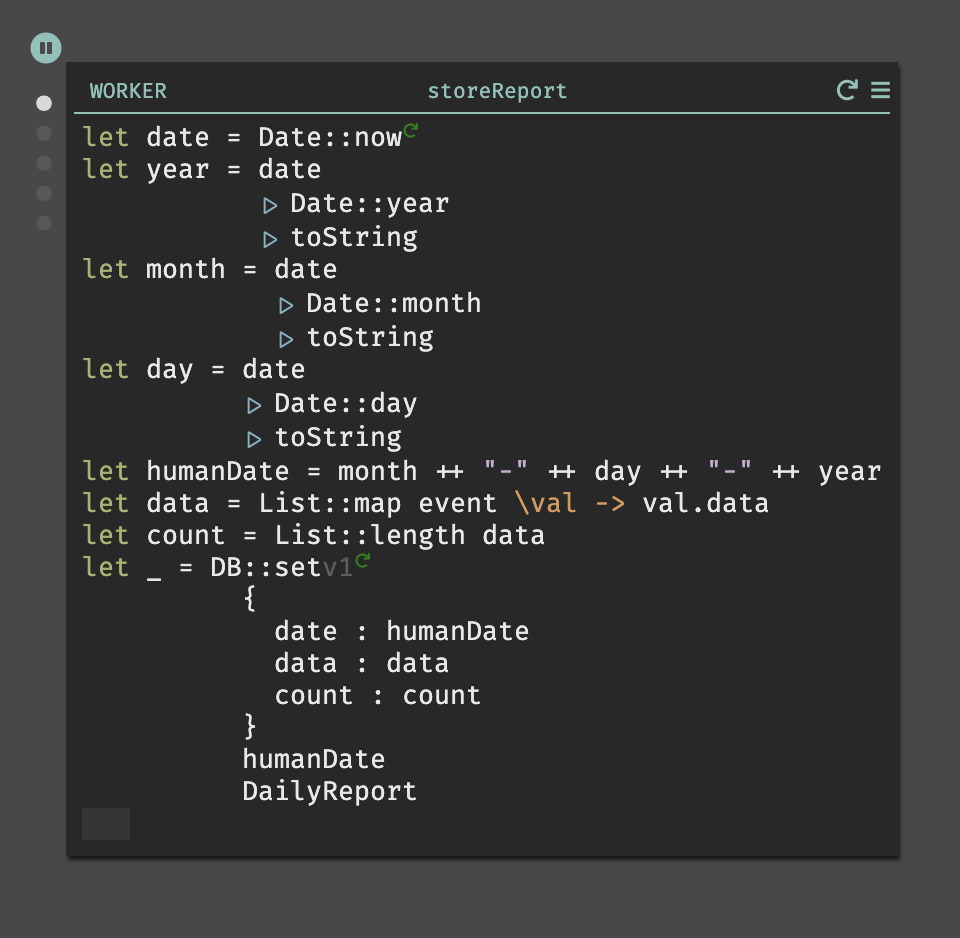
- The
HttpClient::postfunction takes four arguments. Paste the URI from Airtable from the base into the first argument.
- Above
HttpClient::postdeclare a new variable,airtable_header. Use theHttpClient::bearerTokenand pass your API key function as the argument. Then, pipe|>intoDict::mergeand merge withHttpClient::jsonContentType. Theairtable_headerwill now be a nicely formatted header for the Airtable API.
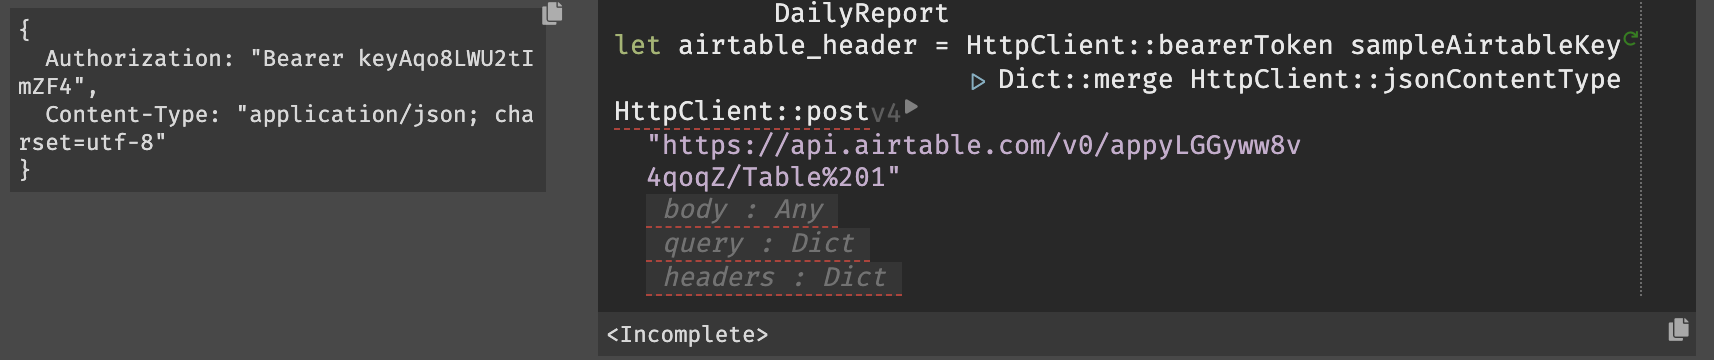
-
The query can be empty for this particular request, but we do need to provide an argument, such as
{}. -
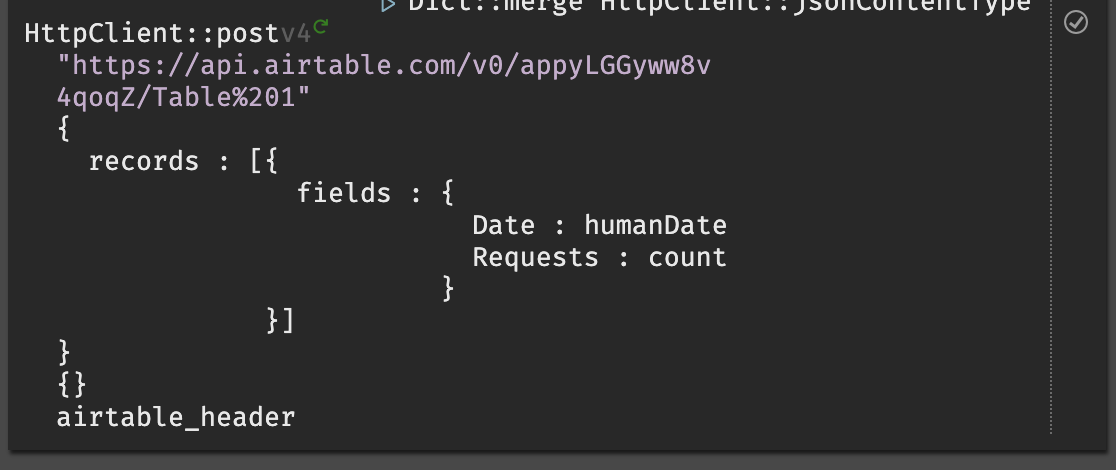
Add the information from the report to the body (the date and number of requests). Airtable expects the following format:
records : [{fields : {Date : date, Requests : count}}]
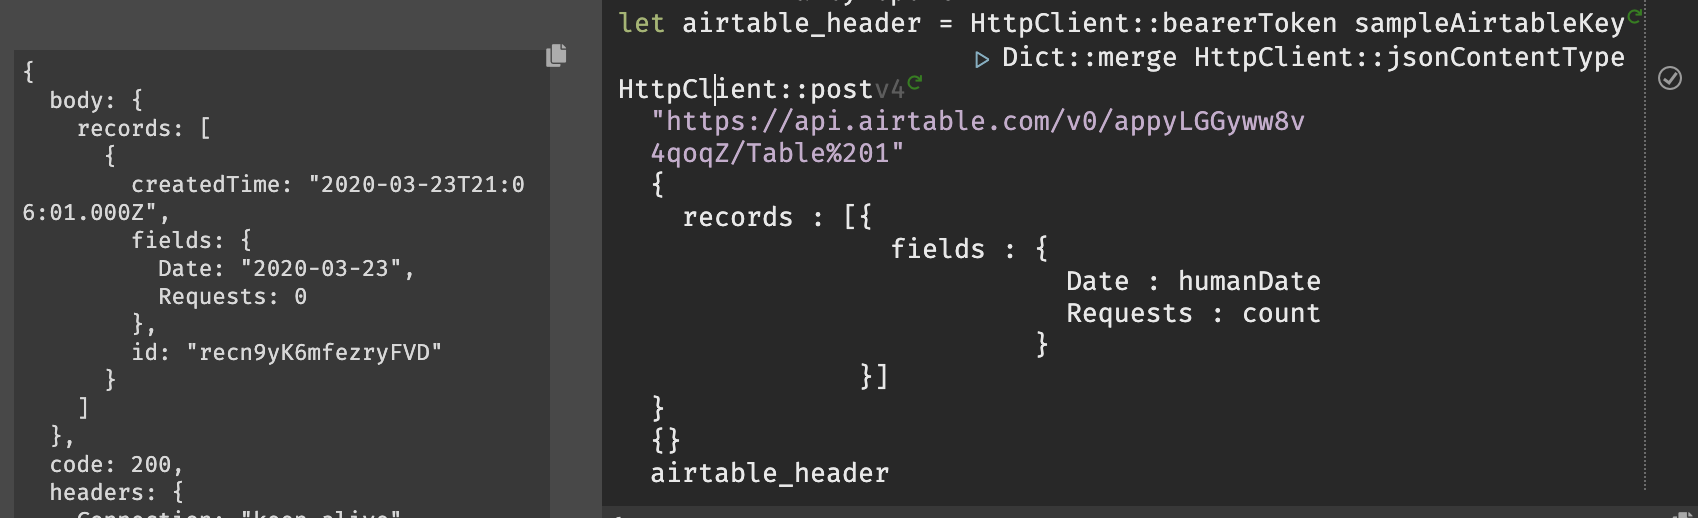
- Run the API request in the editor by hitting the play button next to
HttpClient::post. If the request is successful, a success will be returned and you'll see the record in your Airtable base.
If the request is not successful, the error message will be displayed in line,
and you'll see the Error on the error rail. In this case, the format of the
date passed did not expect what Airtable expected.
- Each time your cron runs (daily, or when triggered) a record will be added to your Airtable base.