Walk-through: Create Asana tasks and projects from Slack
Connecting your Asana account with your Slack account can make for a powerful tool - no more switching tabs and hunting for the right Asana project when you want to capture the excellent idea that just came up. In this tutorial, we'll show you a few ways to enable your team to create new Asana tasks directly from Slack.
Asana Configuration
For this tutorial, you'll want to grab a couple different things from Asana and store each of them as separate functions in Darklang:
- Your personal access token
- The id of one of your workspaces. The easiest way to access this is via the admin panel - it will be the long number in the URL.
Slack Configuration
- Create a new app in Slack.
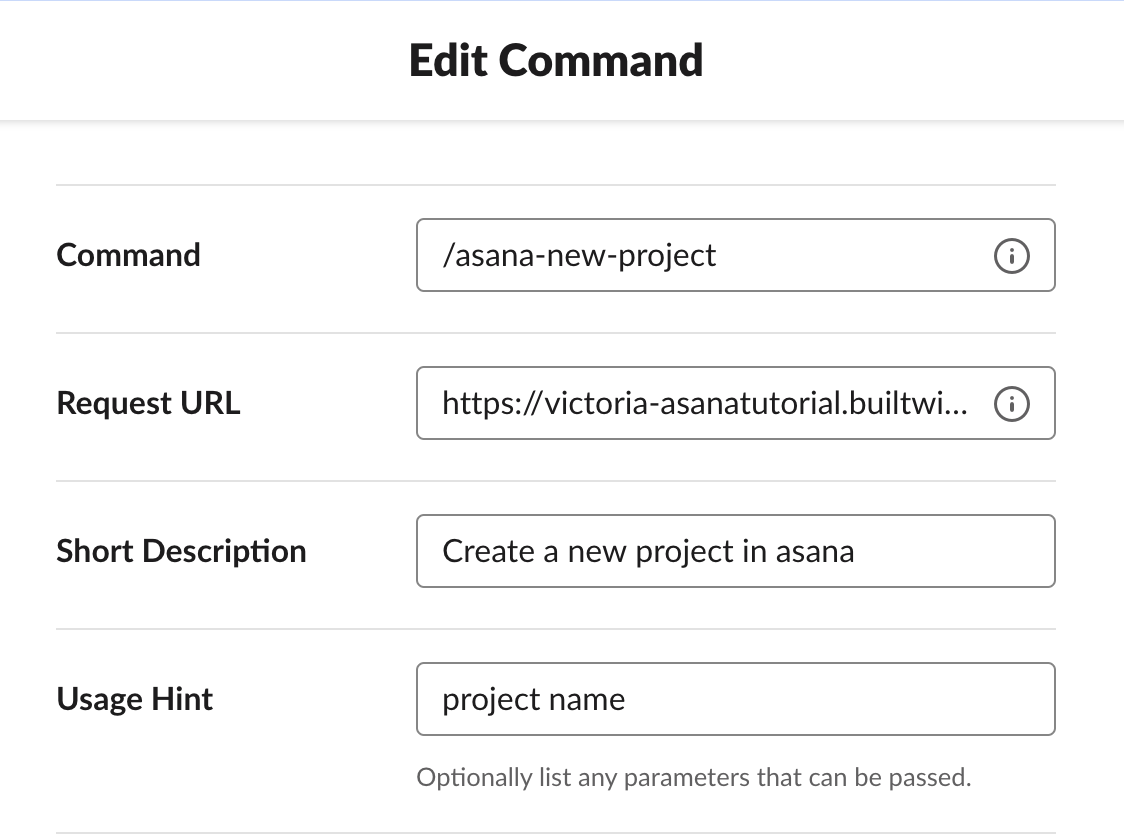
- Set a Slash command (the option should appear under Add features &
functionality on your app's main page). Your Request URL should look
something like
https://yourusername-yourcanvasname.builtwithdark.com/new-project. This is the URL that Slack will call when you use your slash command - don't add anything to your Darklang canvas just yet.
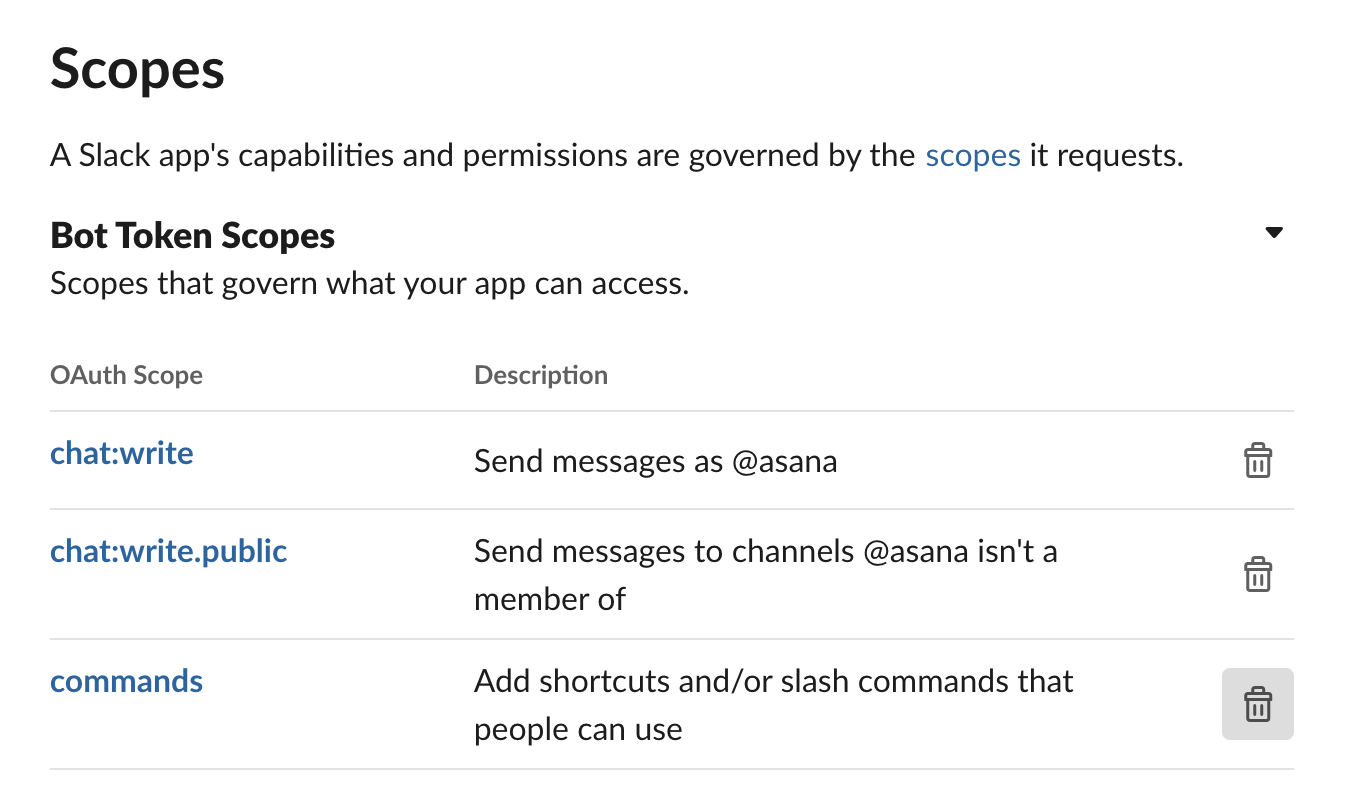
- Go to Features -> OAuth & Permissions and add the following scopes to
your app:
chat:write,chat:write.public,commands.
-
Install your app to the workspace (either via Settings -> Basic Information or Settings -> Install App). Since this app is being built for your workspace specifically, we will not need to set up full OAuth, like we would if we wanted to distribute this more publicly.
-
Copy your bot user access token, which will now be available under Settings -> Install app and save it as a function in your Darklang canvas. Use this function wherever you see
slackTokenin the code examples.
Building In Darklang
First, we're going to learn how to create new Asana projects using slash commands.
- Go to Slack and try to use your new slash command. Make sure to include some text after entering your command. You will see an error message appear.

- Navigate to your Darklang canvas and check the 404s section in the sidebar -
you should see an HTTP POST created called
/new-project(or whatever you used when setting up your slash command). Click the plus sign to add it to your canvas.

- Once your handler is on your canvas, you can click on the trace (the white dot to the left) to see the incoming data Slack attempted to send.

- You will see a text field in the body of the trace data. Use
request.body.textto set your project name.

- Using the
Asana::createProject functionand the data we grabbed from the trace, we can now create a new project. You will need to use the workspace id and personal access token you saved in the set-up process.

- Try your Slash command again and then check Asana - your new project will be there!

- Now, let's try sending over a slash command with different data. Return to
Slack and use your slash command again, but this time, write a project name,
\sign and a description and send it over (something like\asana-new-project Another New Project/Notes on the project). Return to Darklang and check the traces - you should see a text field formatted like this:

- Now, we can use the
String::splitfunction to separate out our two pieces of information, and add them separately to theAsana::createProject functionfunction.

Looking Up Project & Workspace IDs
You're not always going to want to pre-define your workspace or projects via
Darklang functions. This section will show you how to take a project name as a
String and get the corresponding id. We'll be using projects for this example,
but it works the same way for workspaces.
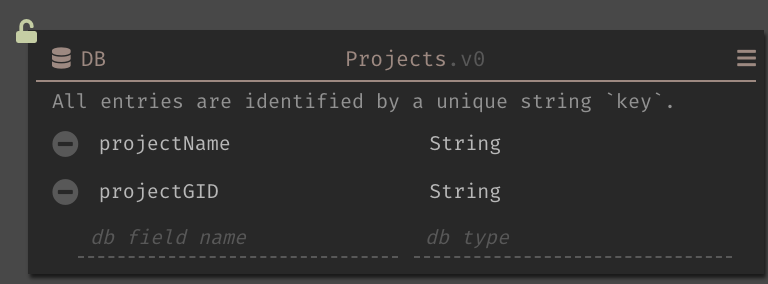
- Create a Projects datastore.
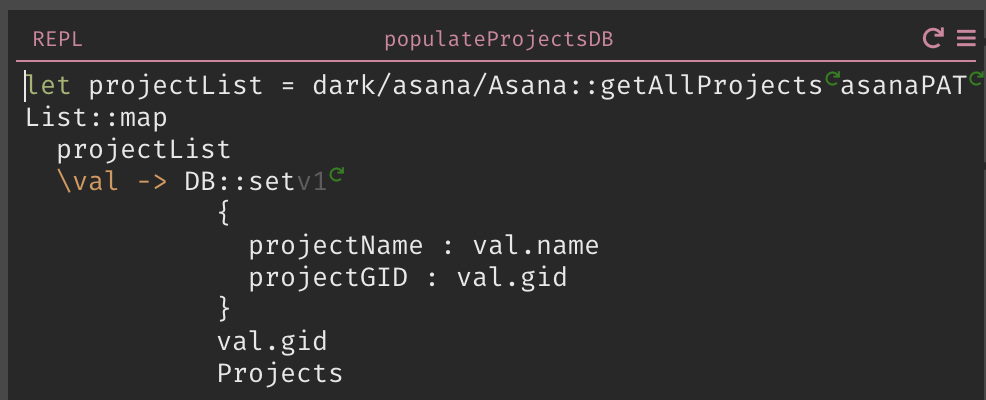
- Create a new REPL. First, use the
Asana::getAllProjectsfunction to grab information about all projects you have access to. Then, use aList::mapto add their names and gids to the DB.
-
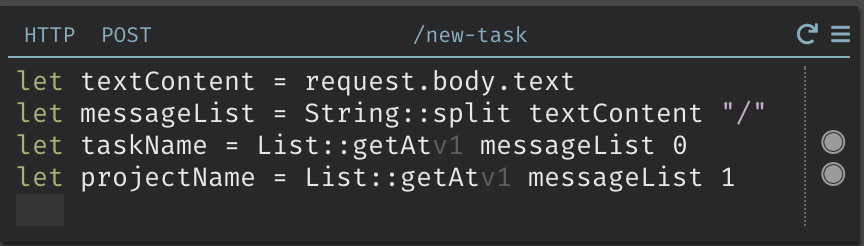
To see this in action, create a fresh slash command and call it, using the task name/project name formatting. To make it easier on yourself, make sure to use a project name that already exists.
-
Split out the information as you did before.
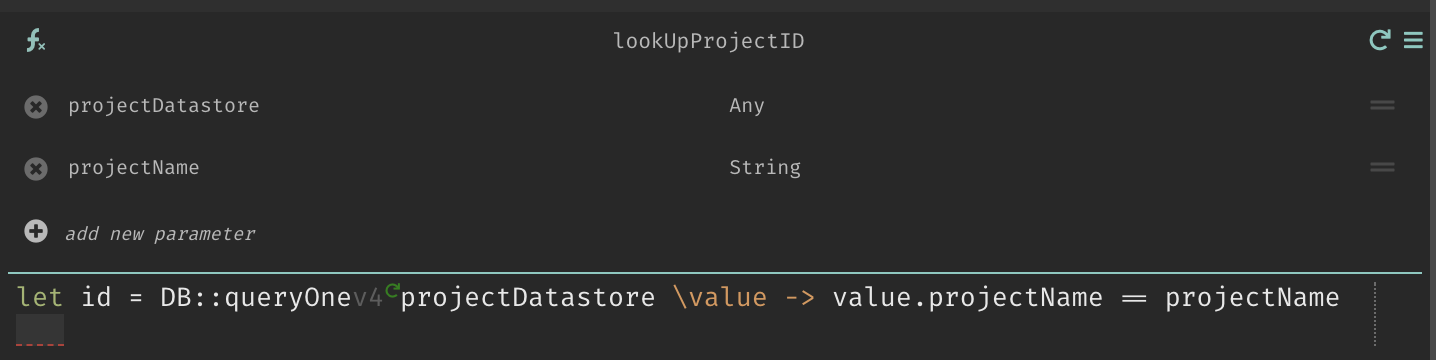
- Create a new function called
lookUpProjectIDand then useDB::queryOneto grab the id based on theprojectName.
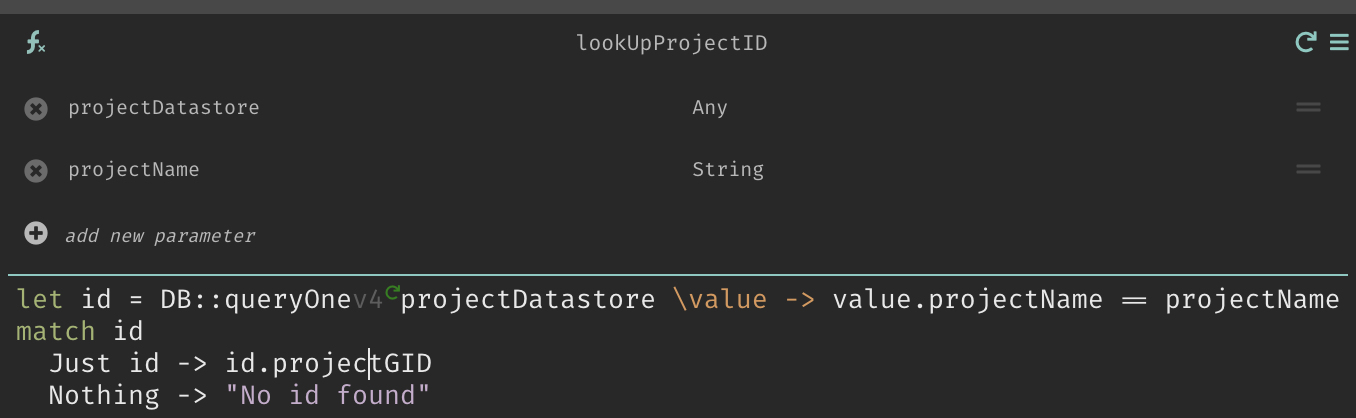
- Use a match statement to handle both the success and failure (couldn't find the project name in the db) case.
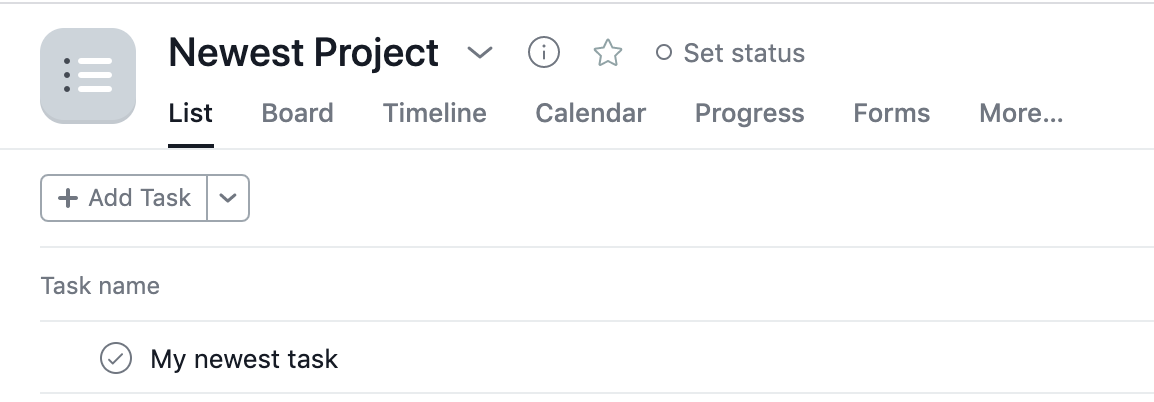
- Use your new function your HTTP POST handler.

- Call the slash command again and check Asana - a new task should be there.
Making input easier with modals
Okay, this is all great, but still has some problems. What if someone forgets to add the right special character? Let's make it a little easier, by creating a modal to handle their input.
- Create a new slash command.
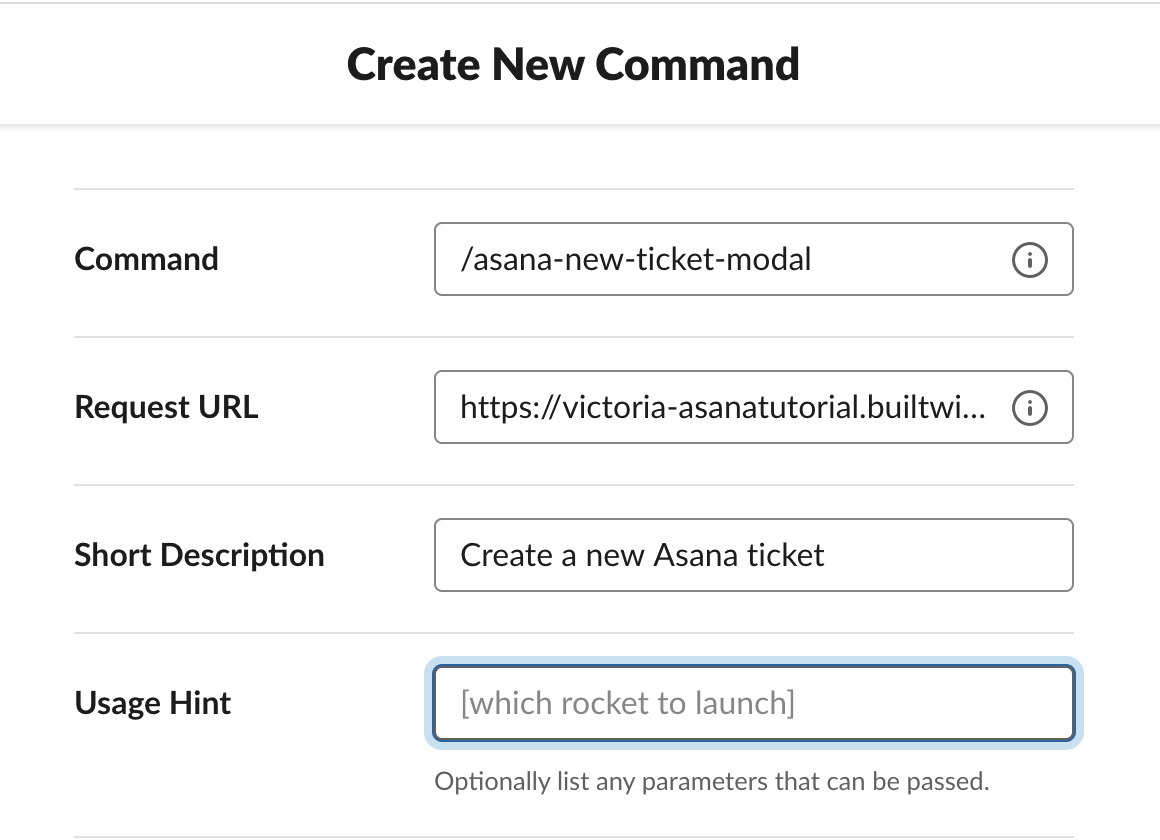
- Turn Interactivity on via Features -> Interactivity and Shortcuts and specify a URL for the interaction to be sent to:
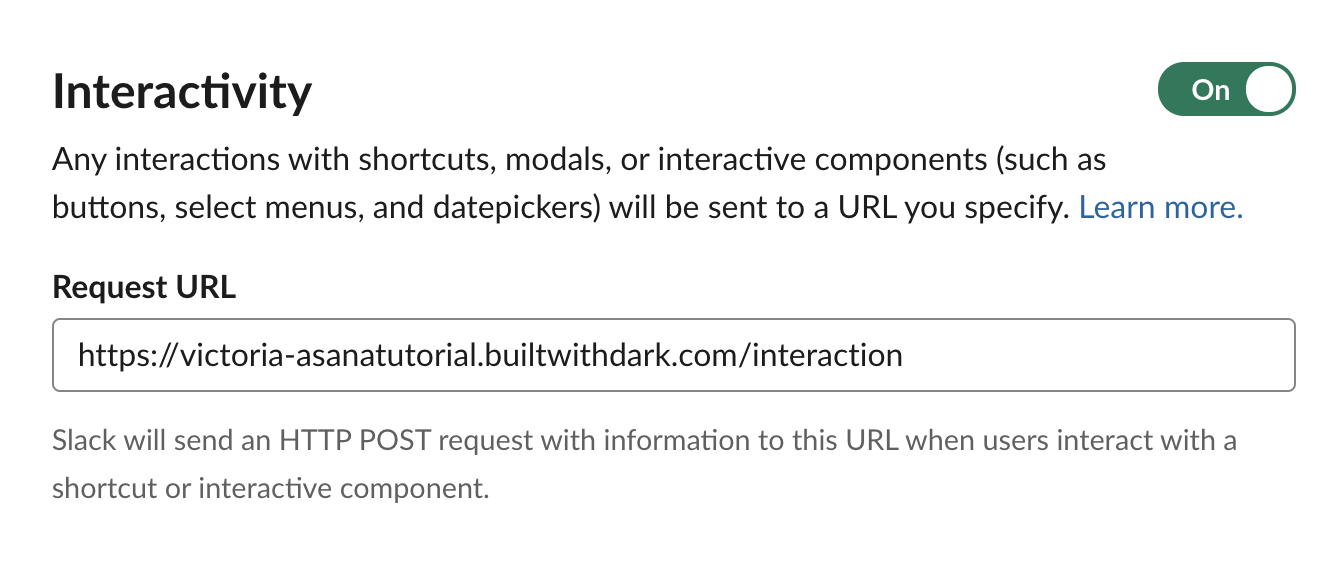
-
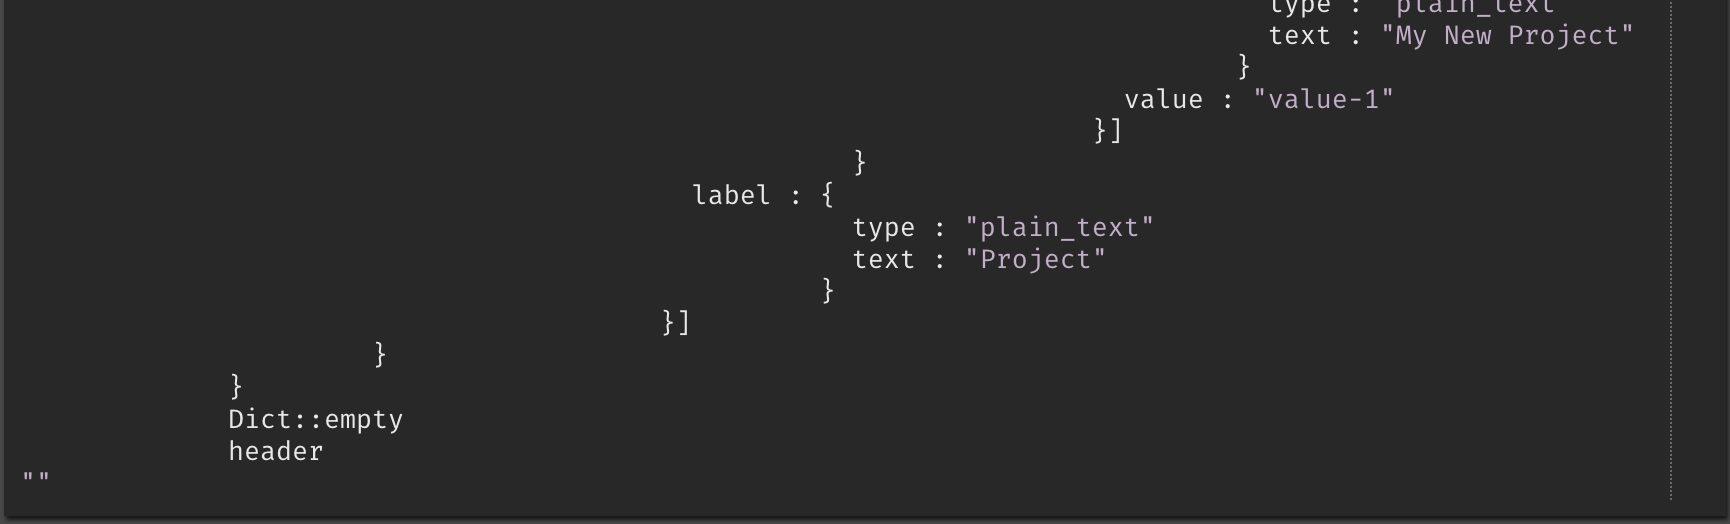
Slack uses
JSONto generate modals via a framework called Block Kit, even providing a handy Block Kit builder. At this point, it may make sense to pause and create your modal - we'll need theJSONsoon. The modal we're going to use has 3 fields: a single line for the task name, a multiline for the task description and a select for a list of projects. -
Call your new slash command and grab the 404, as you did in previous steps.
-
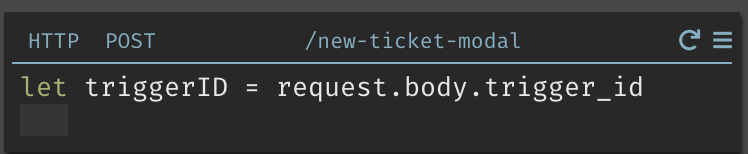
Start by setting your
triggerIdusingrequest.body.trigger_id:
- Format your header - you will need the Slack token you grabbed earlier in the set-up process.

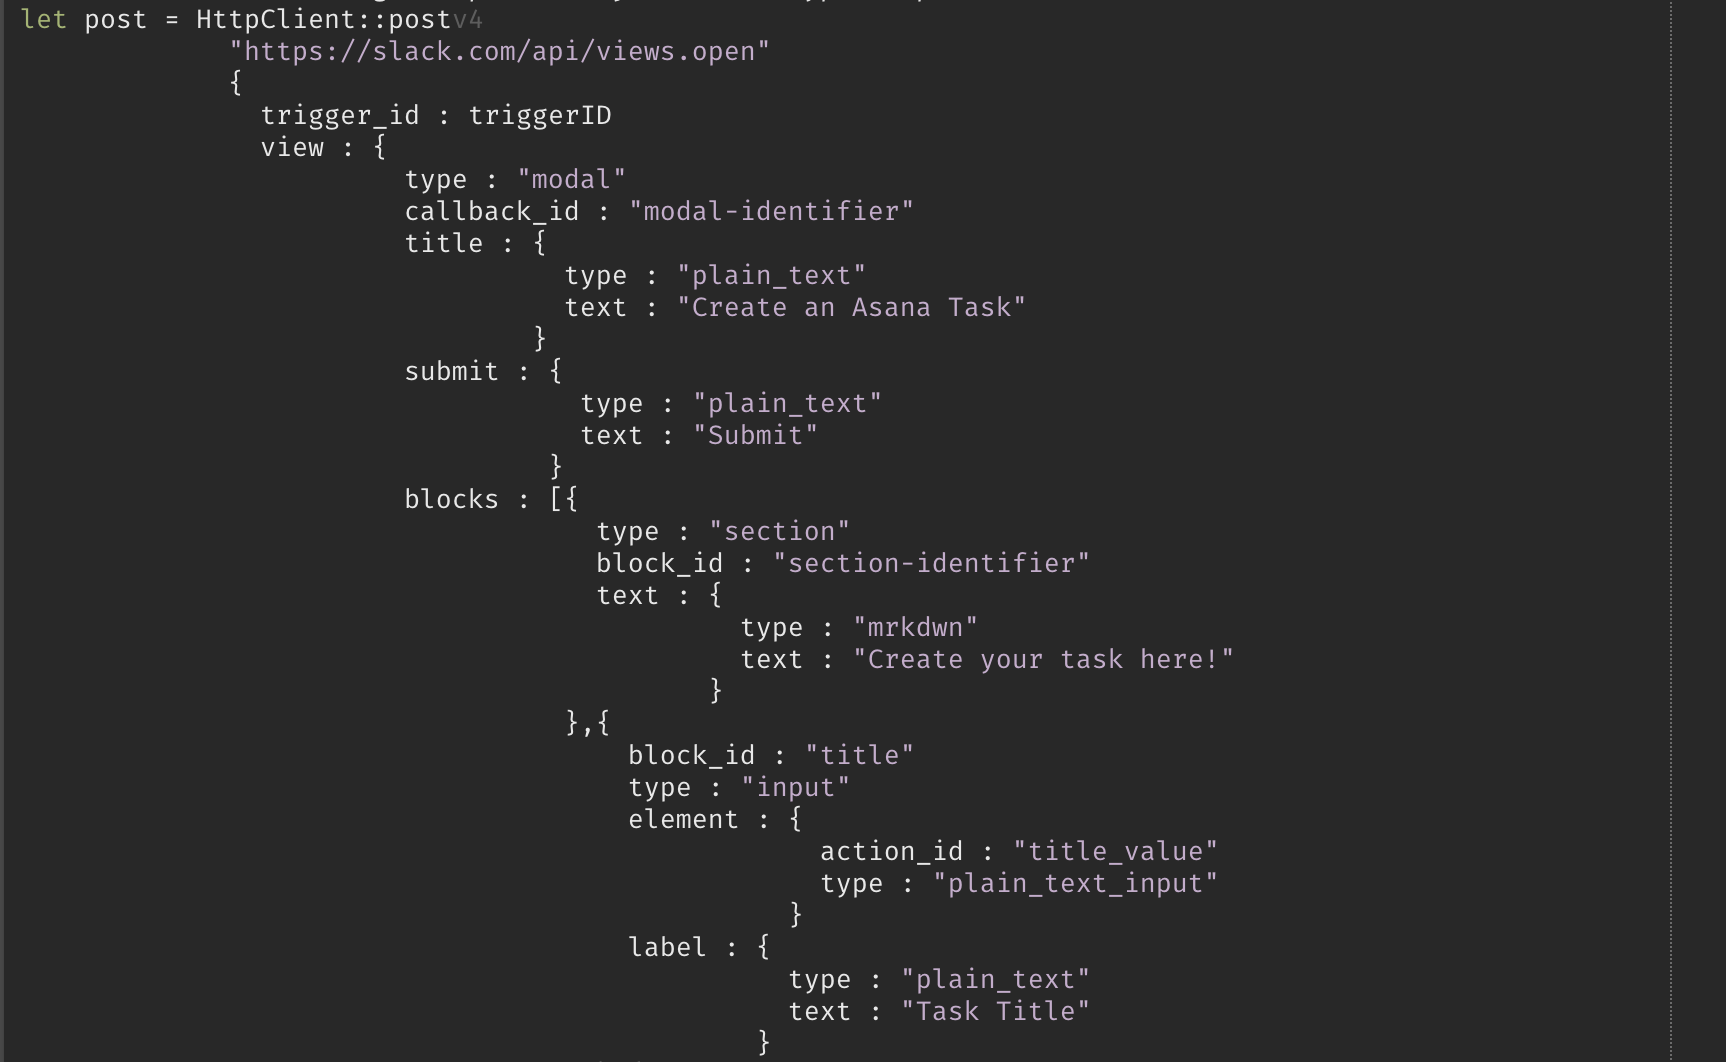
- Create an
HttpClient::postrequest and add yourtriggerIDandJSON. These are truncated screenshots with a lot of the JSON cut out:
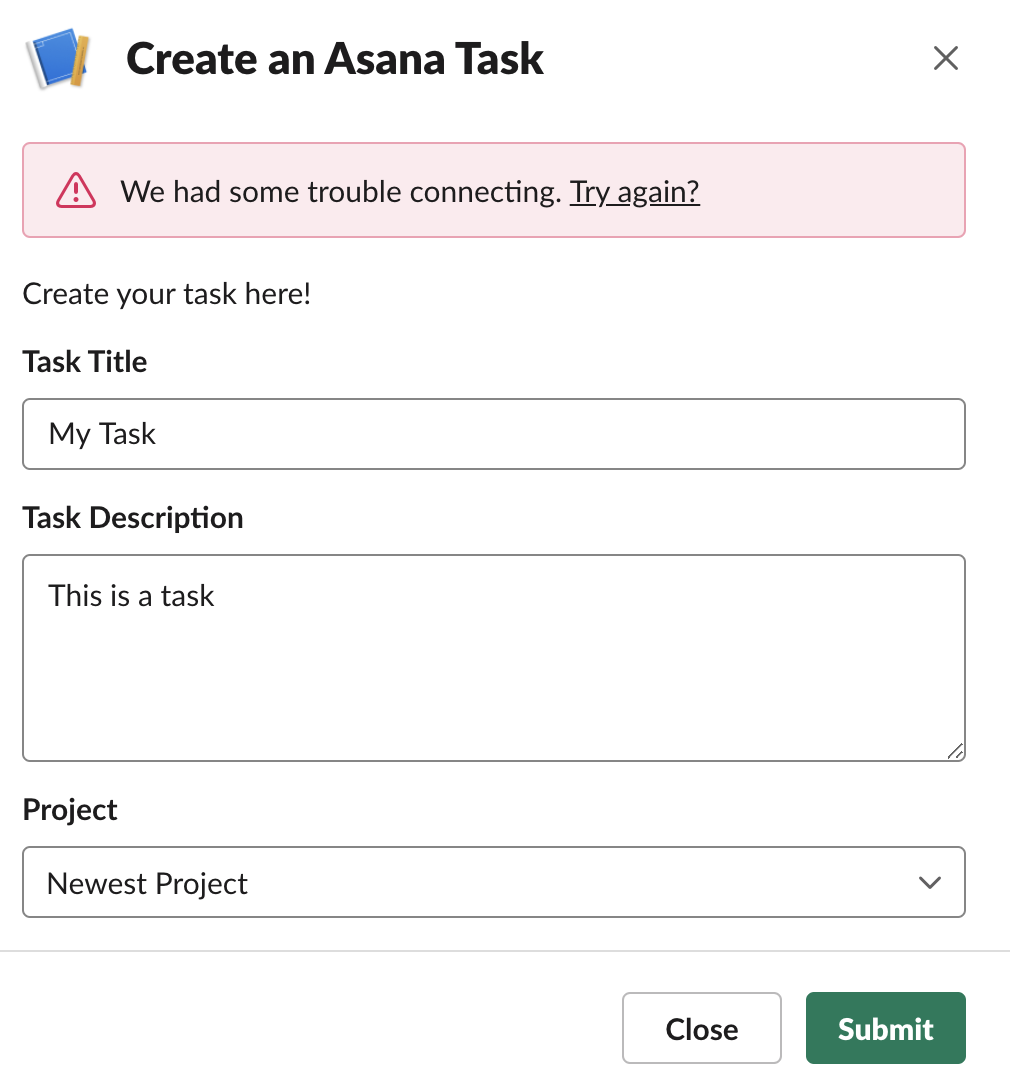
- Try your new Slash command. A modal should appear. Fill in the modal and hit submit to get a new error message:
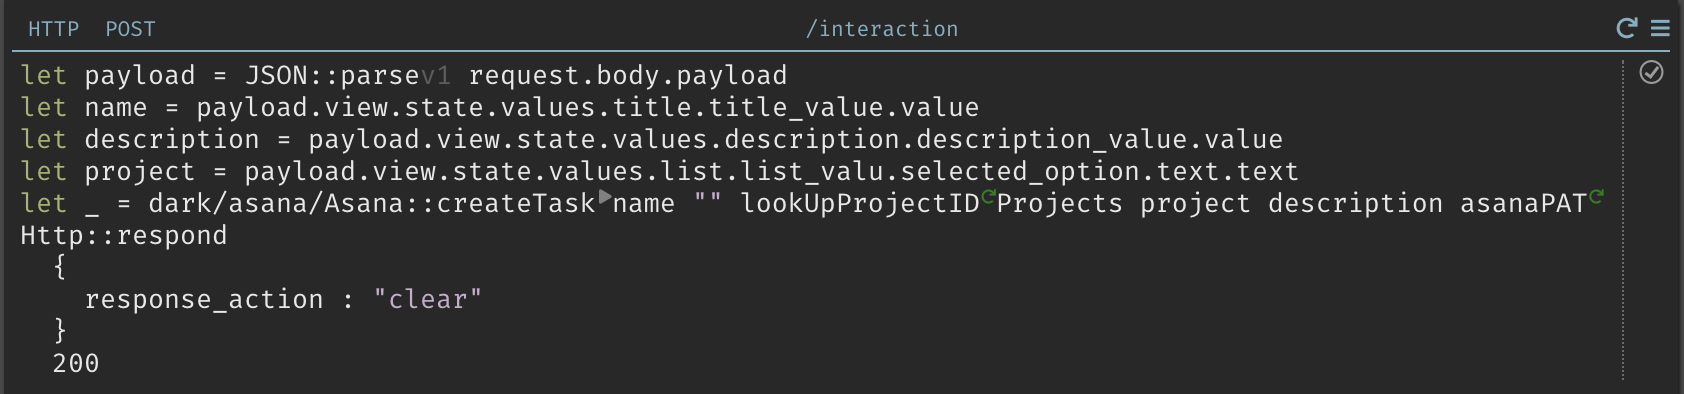
- Check your 404s and add your new handler. This is the handler where the
behind-the-scenes logic will happen. Start by formatting the payload into
JSON.

- Now grab all of your important values from your modal fields:

- Use the
Asana::createTaskand thelookUpProjectIDfunctions to create your new task.

- Respond with a
200.
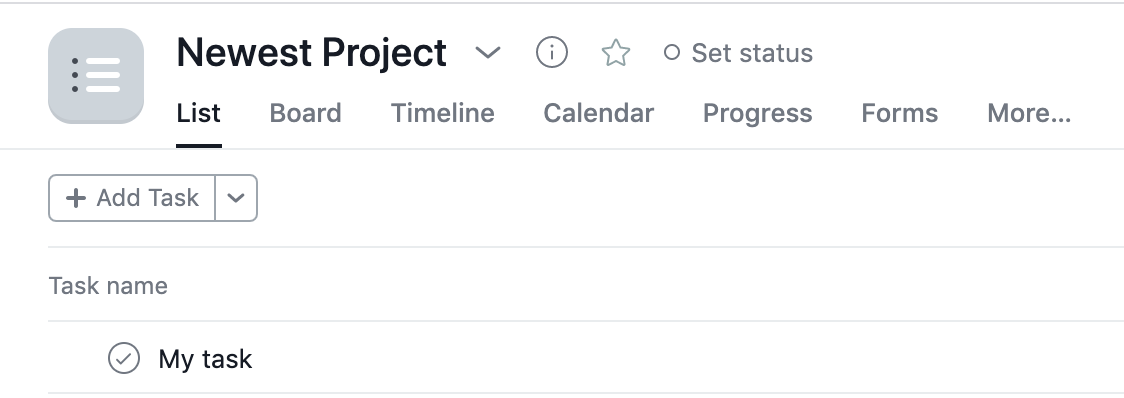
- Check Asana - your new task should be visible in the project your specified project.
Congratulations, you now have a Slack app that can create Asana projects and tasks in multiple ways!