Walkthrough: Build a backend to a React app
Watch a demo video of this project: https://vimeo.com/360007420/01c205fe0f
Getting started
Darklang allows you to build backends (API endpoints, workers, cron, and data storage) by writing only your business logic, using production traces.
You can access you canvas at darklang.com/a/USERNAME-CANVASNAME (we recommend USERNAME-signin for this project).
First, on that canvas build a hello world API endpoint to get a feel for Darklang:
All the major handlers work the same way, but the key for many requests is working directly with incoming data.
This Guide - Office Sign-in
We’re building this app: https://sample-signin.builtwithdark.com. It’s an Office Sign-in SPA, built in React. From the form, you pick a host, announce your name as the visitor).
The application backend will have an API, data storage, and asynchronous background workers to talk to external APIs (Twilio & Slack). You will need Twilio & Slack tokens, which we explain how to get below during that portion of the tutorial.
Yours will live at [https://USERNAME-signin.builtwithdark.com]; to work on it go to [https://darklang.com/a/USERNAME-signin].
Quick start
We’ll need some setup on your machine to upload the react app. Run these commands on OSX to install. To read a longer version explaining what each of these commands do, go here:
Hosting Static Assets in Darklang
Note, replace anywhere that says USERNAME and PASSWORD with your Darklang username and password.
git clone https://github.com/darklang/dark-signin.git
cd dark-signin
npm install
npm run build-for USERNAME-signin
npm run get-dark-cli
./dark-cli-apple --canvas USERNAME-signin --user USERNAME --password PASSWORD build
If you get “Not found” on the last step, you’ll need to visit [https://darklang.com/a/USERNAME-signin] first in your browser.
Serving Hosted Assets
When you go back to Darklang, your assets will be available (in this case, our compiled Javascript application).

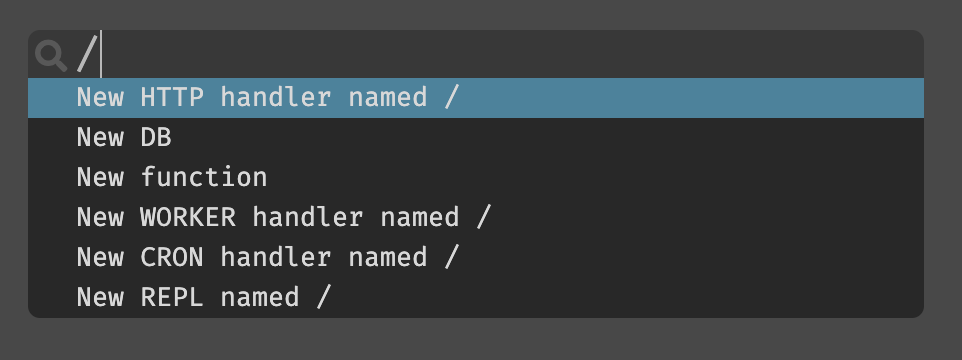
Now, let’s put the assets at the base of our API by creating a new route named
/ from the omnibox, or the side bar:
Once the route is created, we can specify it’s a GET method, and start writing
code.

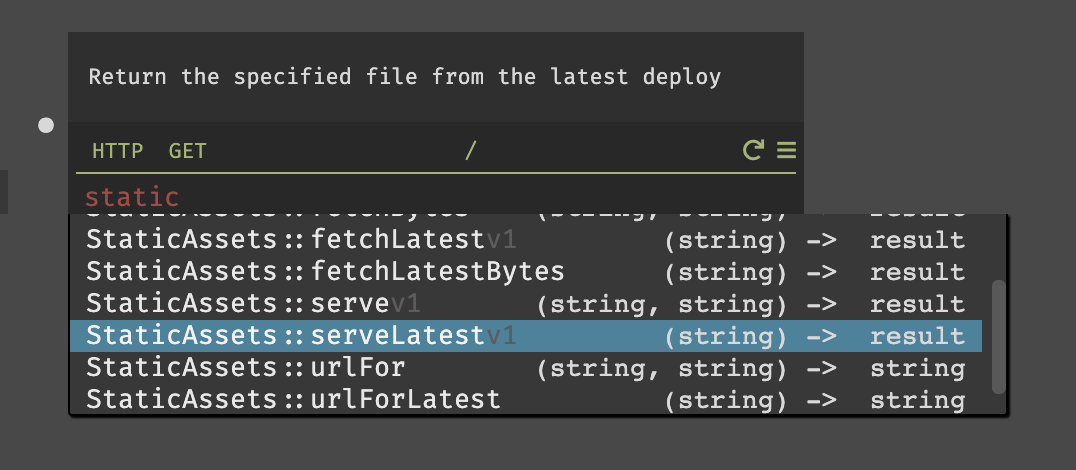
The finished API will look like this, and you can open it from the hamburger on the right (the tutorial copy is at https://sample-signin.builtwithdark.com/, and your copy is at USERNAME-signin.builtwithdark.com/).

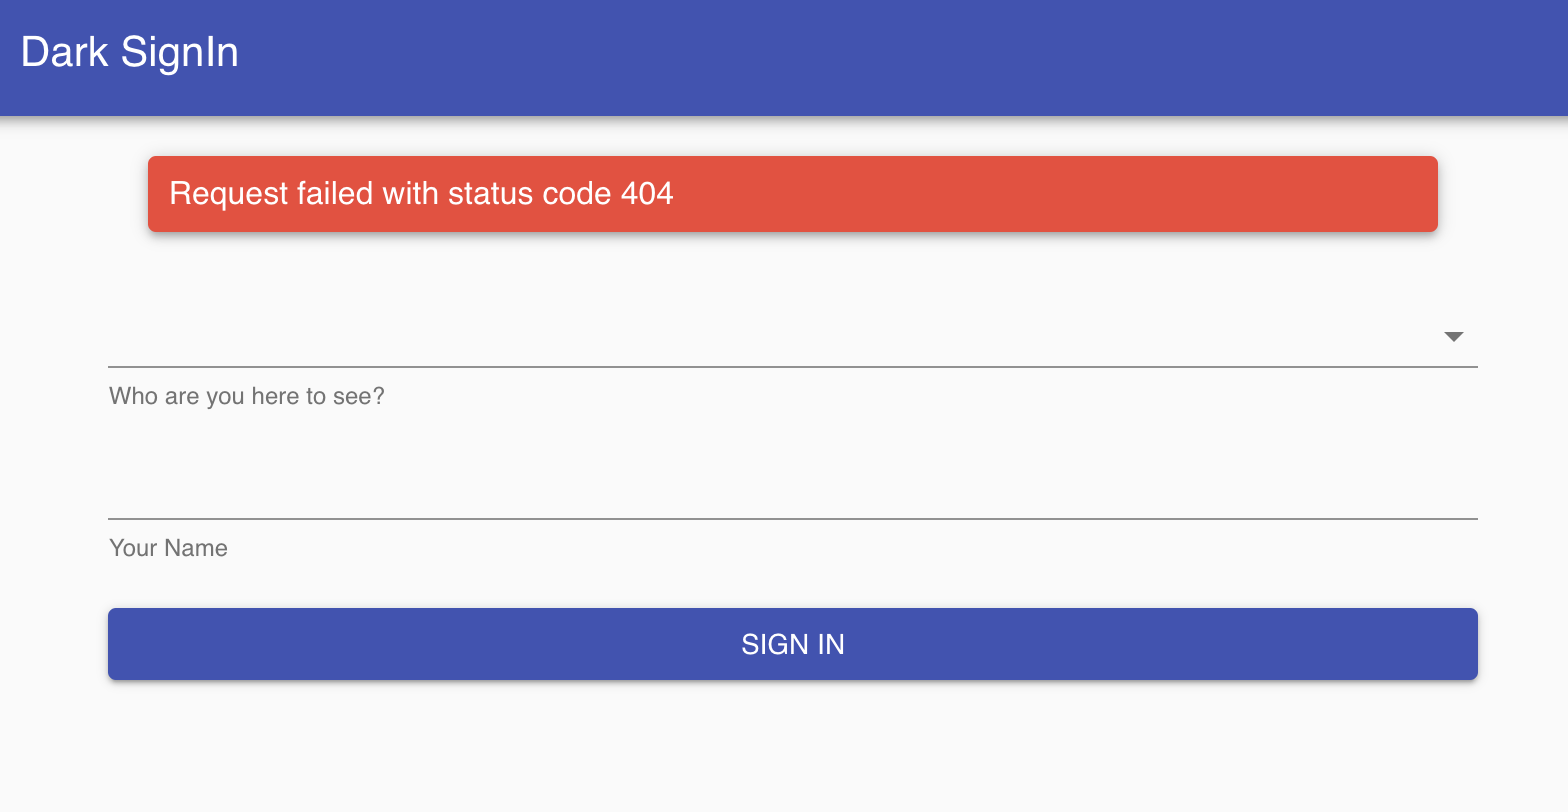
When you open the page it looks like this:
Building the API - Trace Driven Development
Now, we can build a backend based on the frontend we have. The react app has two requirements:
GETHosts- Providing the list of available hosts.POSTVisit- Checking in and triggering what needs to happen when a visitor arrives.
Setting Up the /hosts Endpoint (API, Datastore, REPL)
From Darklang, we can see the failed request.
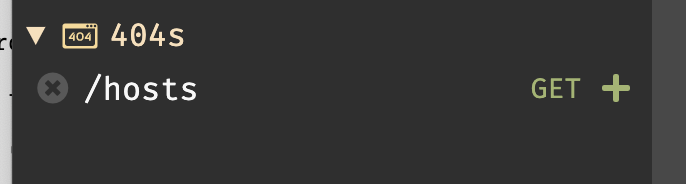
If you do not see a failed request, verify that your host URL in your frontend matches where you’ve hosted the application.
Hit the + button to create the route. The route will have the trace from when
we opened the page.

Now we have our endpoint (you can try it out by making a list
["name1", "name2"] and refreshing the React application:

But for the longer term, we’ll need other backend components (in particular a datastore) to support the endpoint.
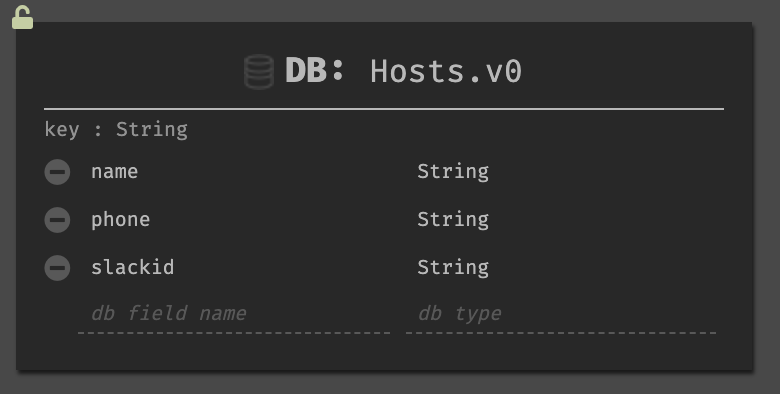
Create a datastore which lists all hosts. We can create it from the omnibox or the left side bar, and rename it. We can also choose other parameters. In this case, I’ve chosen phone numbers and Slack IDs to send texts and DMs.
Datastores in Darklang are key-value based, not relational. This tutorial will include step by step instructions, but more information on datastores is available here.
We can add data to the datastore by using a REPL, an internal tool for the application.
We can name the REPL (or it will have a default adjective-animal name) and then

When we write DB::set into the handler, we’re given three parameters for the
expression. The value, the unique identifier for the record, and the table.
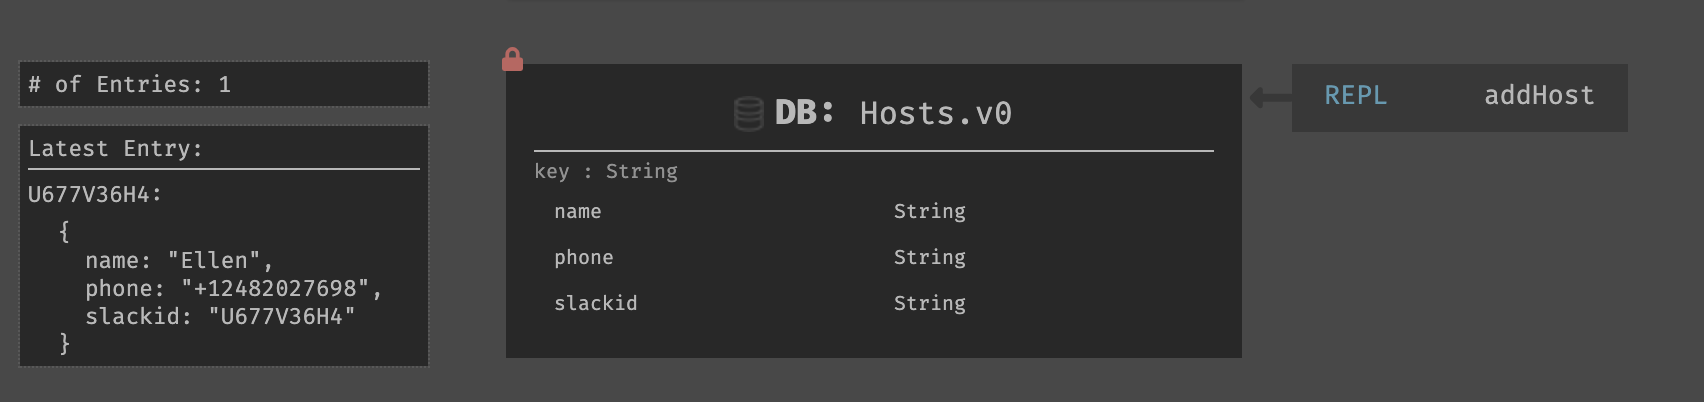
Here’s the finished REPL:

In this case, I chose to define slackid as a variable so I could reuse it as a
unique key. You can do this after the fact using Cmd/Ctrl-\ on the value to
extract a variable, or just rewrite starting from the top.
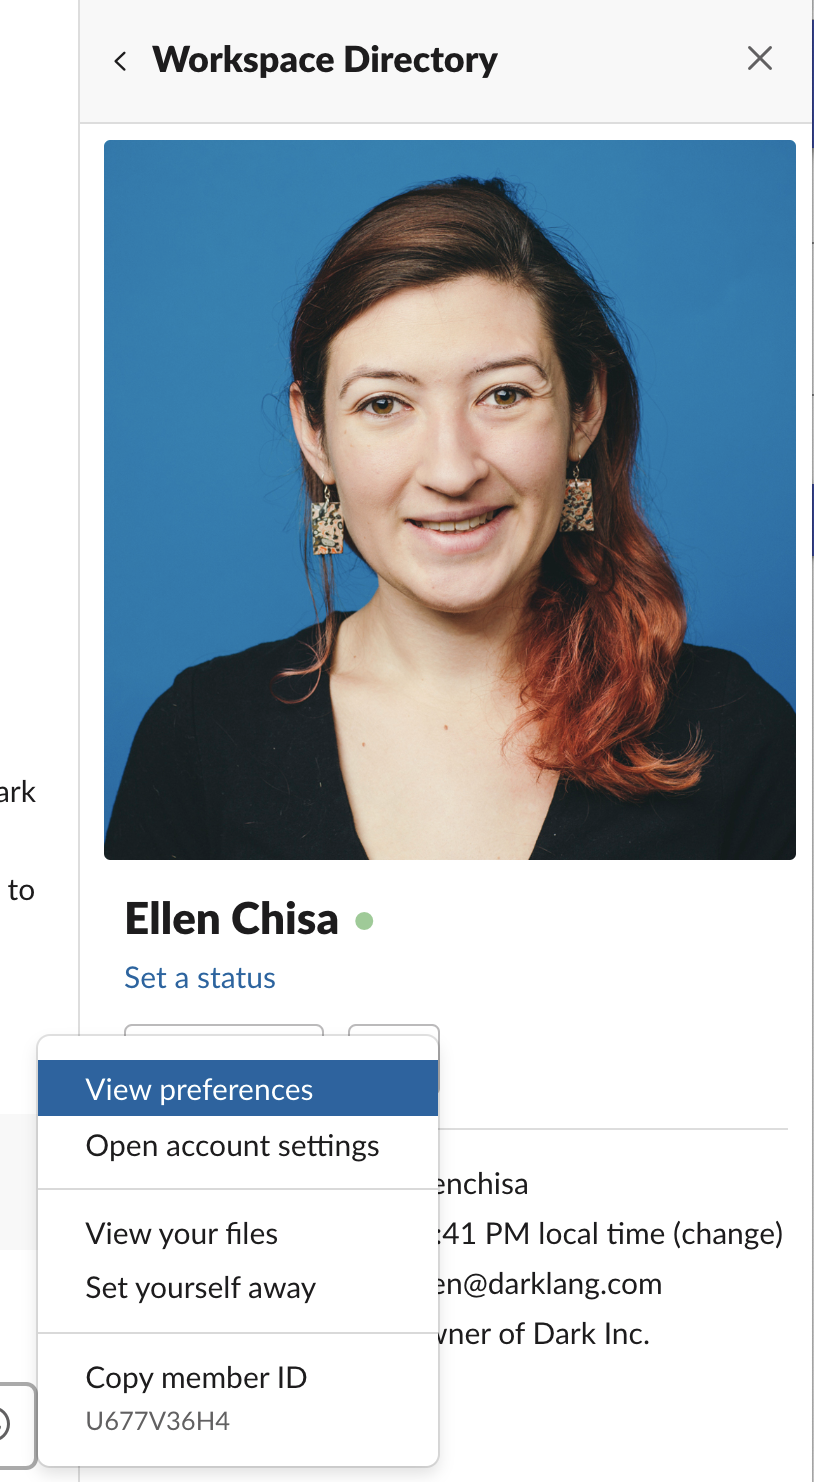
Please Use your own name, phone number, and Slack ID. Your Slack ID is found in your profile in the … menu. You will need permission to install Slack apps on a Slack to do this.
Press the “play” button to insert the value into the datastore (more on interactivity with play buttons).
After this, when I select my datastore, I will see that it has locked and has a connection to the REPL, and the number of items/most recent item (if you do not see the DB stats on the left, refreshing the tab should work).
Then, you can update the hosts API to use our data storage.
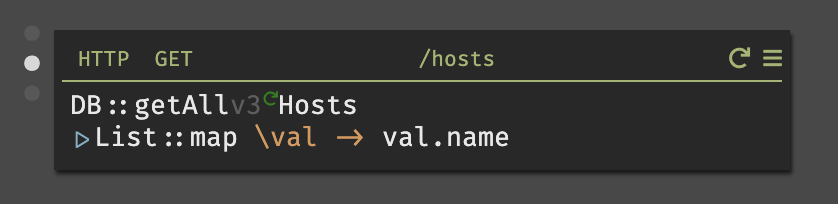
In this case we did a DB::getAll hosts (and played the request). Then, we took
that result (a list of objects) and passed it as a parameter into List::map,
then took the name for each host.
To see how this works, click first on DB::getAll to see the list of objects,
then click on \val to see an example object, and then val.name will show you
the name field.
Functional aspects of Darklang has more
information on pipelines and maps, but for the tutorial copying this code will
work.
If you are stuck:
- Make sure to hit the play button for
DB::getAllso you’ll have real data. - Shift-enter or
|>will open the pipeline. - Typing
\in theblockfield will open the\valoperator.
Setting up the /visits Endpoint (API, Datastore, Workers)
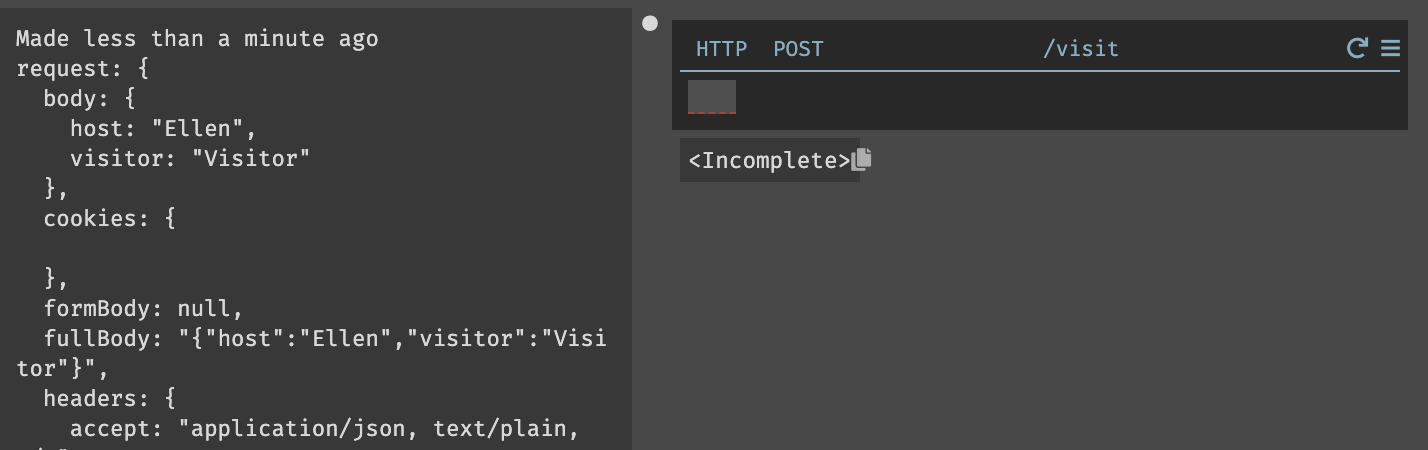
First, we do the same thing and go back to our React application, select a host, then type in a visitor name and hit the “sign in” button. This will result in another 404 that we can create, and see the trace for.
First, we’ll store the visit in a datastore as we did from the REPL when
creating hosts. Like before, we can create a new datastore, and then use the
DB::set expression.
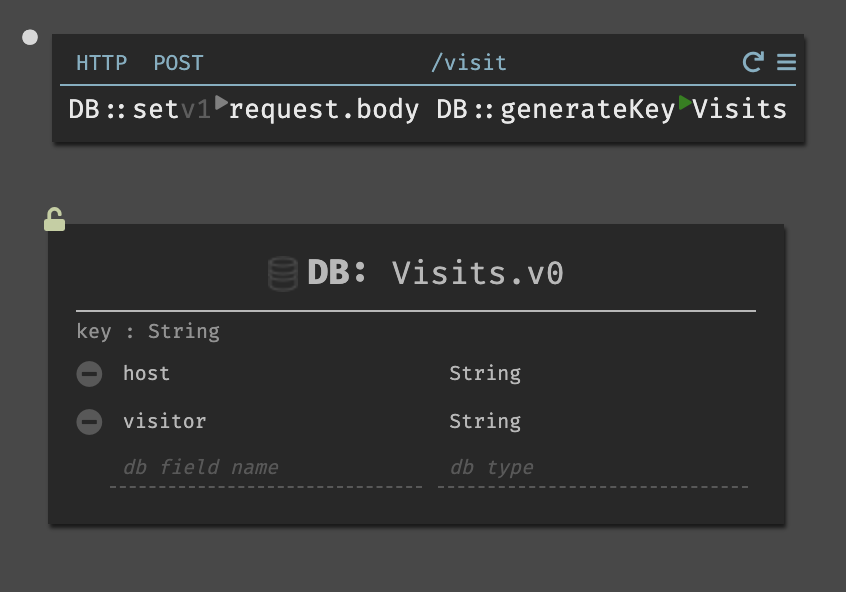
If we match the datastore schema to our incoming request body, we can do it like this:
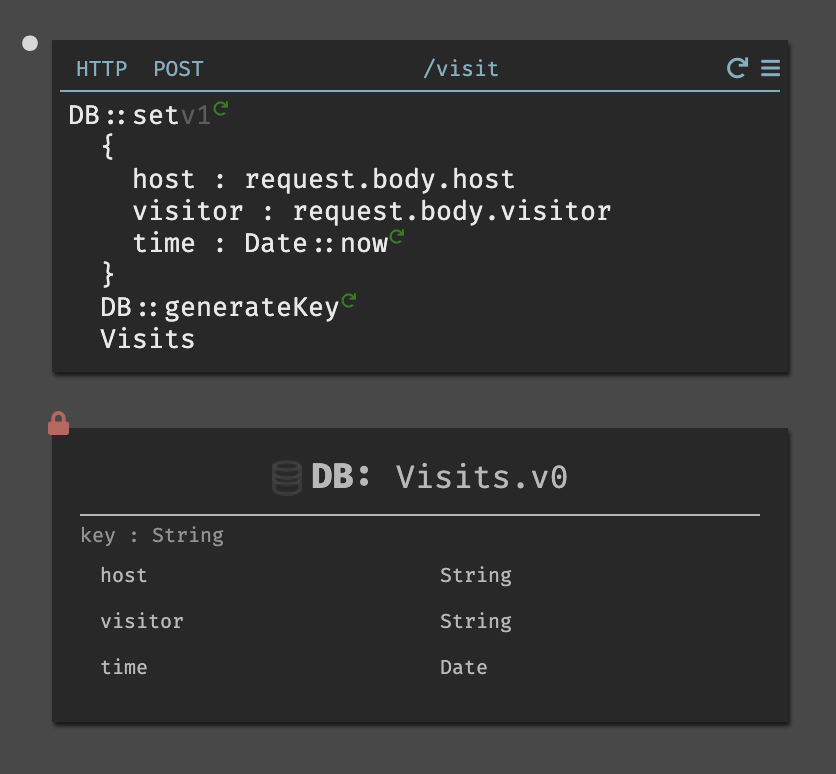
If our schema does not match exactly, we can still use our incoming request. Here’s a version that also stores the time of the visit:

In either case, taking advantage of live values and traces is very helpful. When our cursor is in host, we can see what the trace evaluates to for that value on the left-hand side:
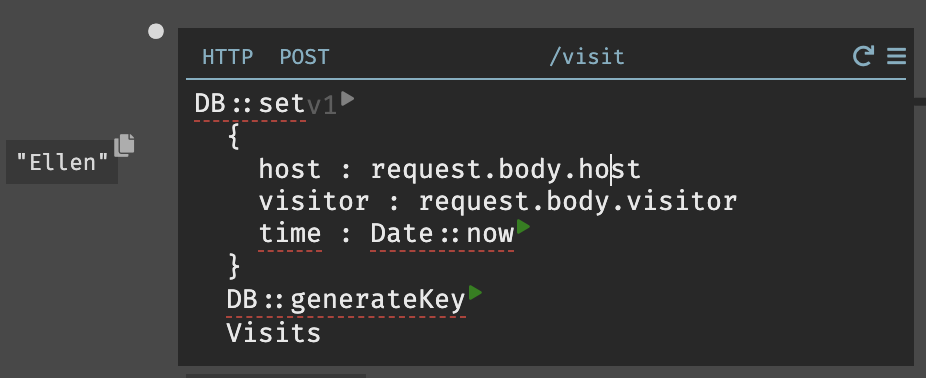
Then, as before, we can run the outstanding functions and insert this trace into our datastore (in this case, we’re building from this specific trace. In the future, when a new sign in happened, this handler would run at that time).
If you’re having trouble, make sure you’ve hit the play buttons and do not have red underlines. The finished handler & datastore once you’ve run and inserted the visit will look like this:
Background Workers & External API connections
For this section you will need a Twilio SID & Token and/or a Slack Token, depending on if you want to send Texts, DMs, or both.
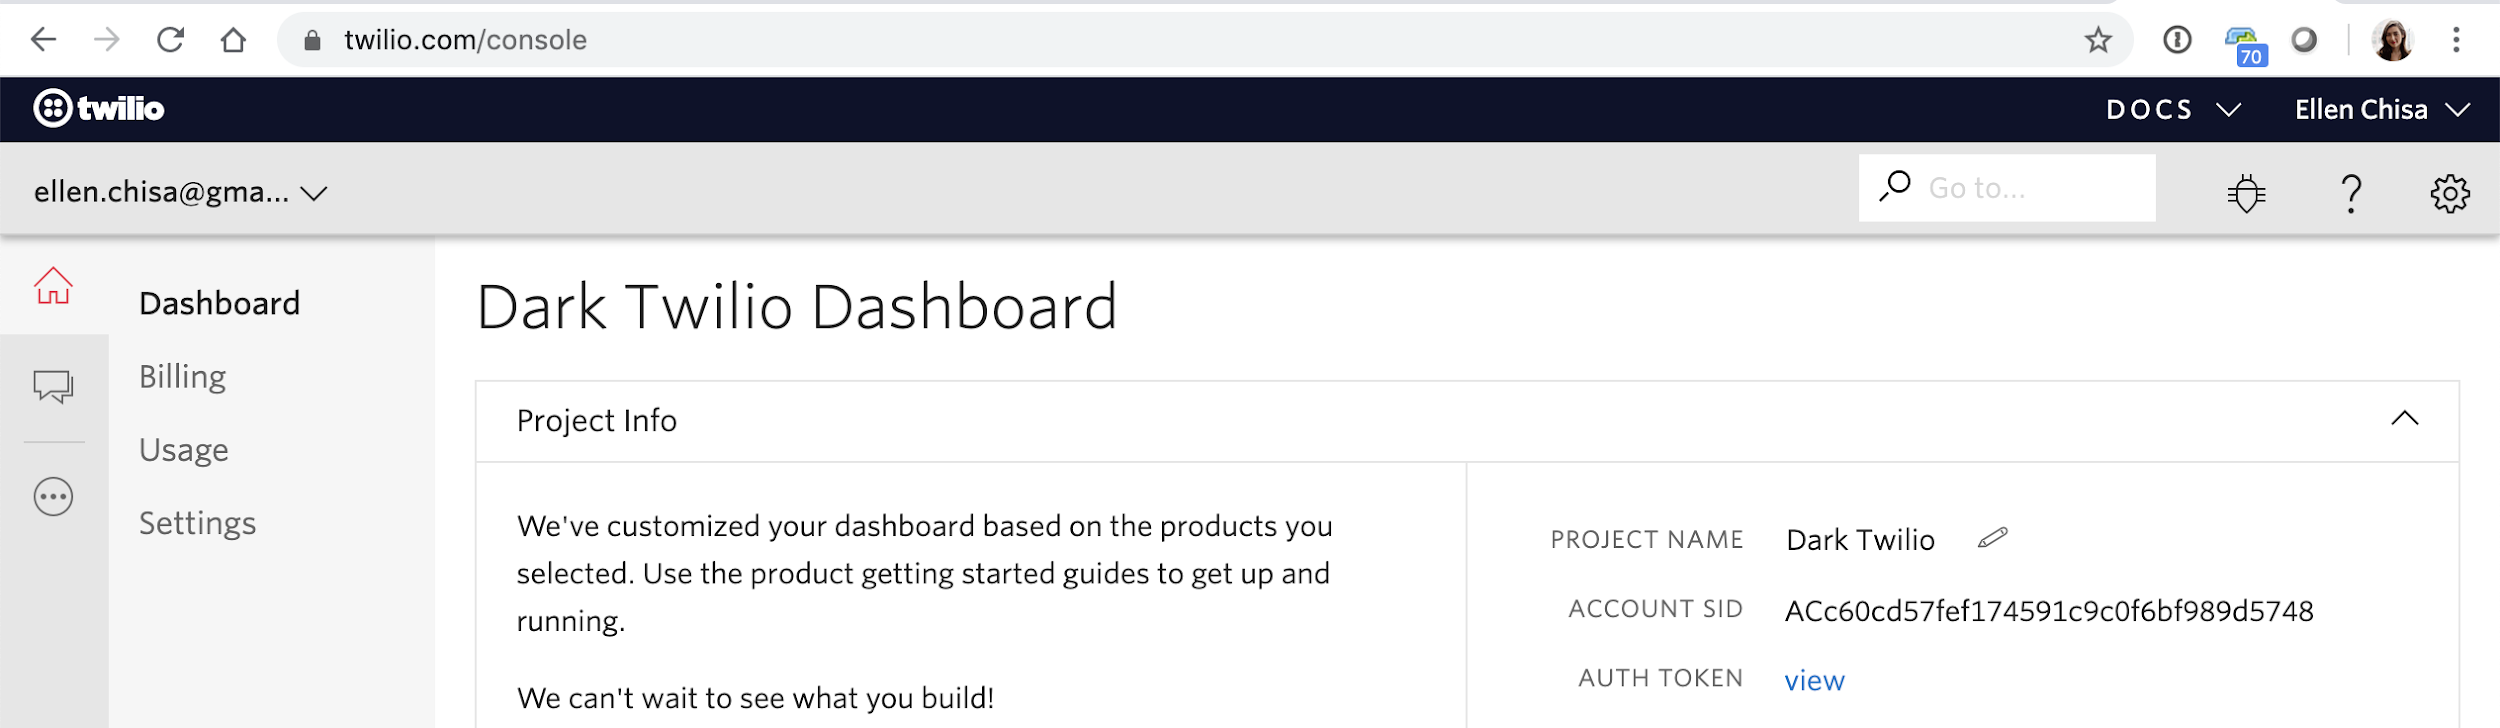
Twilio
To create a new Twilio account, the SID & Token are in your console on the right hand side.
Once you have an account, you’ll need a number that can send texts, https://www.twilio.com/console/phone-numbers/incoming.
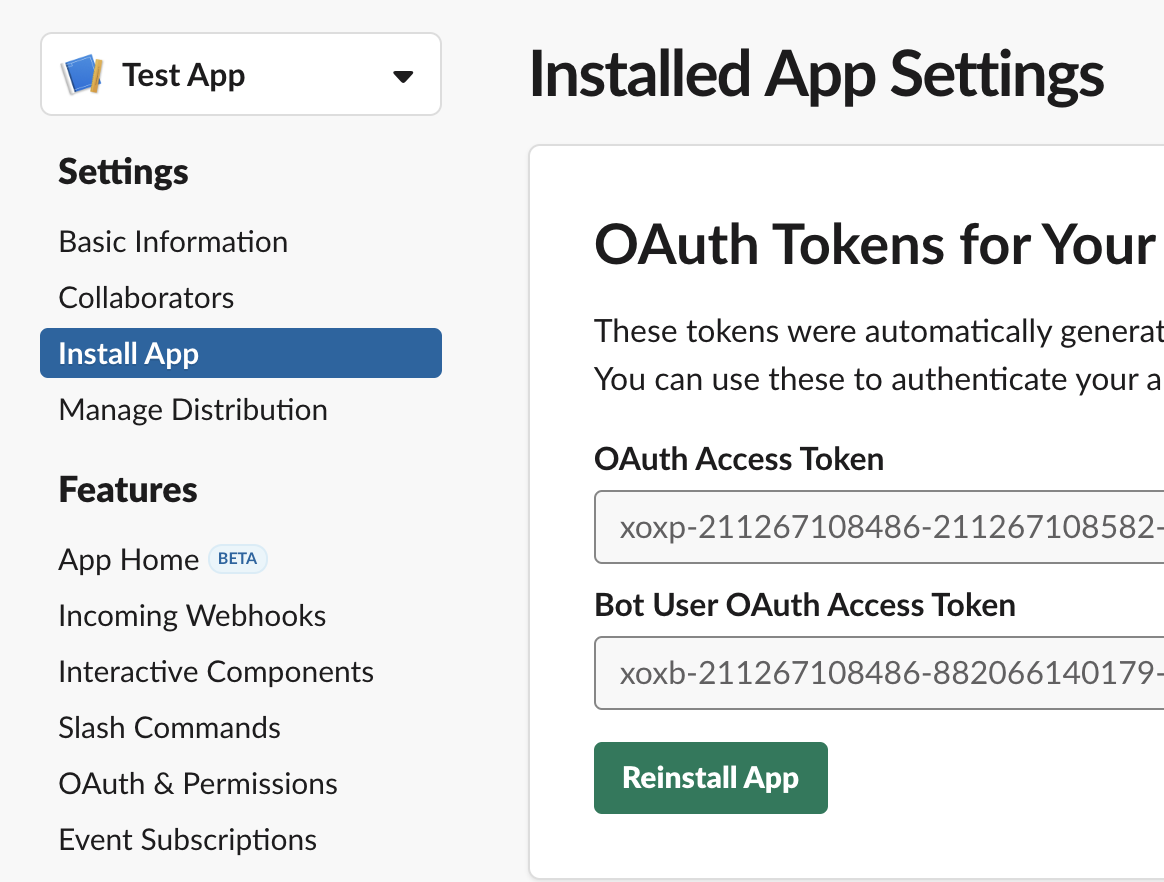
Slack
To create a Slack token, go to https://slack.com/api, create a new application, add a bot from the “basic information” add features & functionality section, and install the app in your workspace. After doing so, you’ll get two tokens back, one of which is the format "xoxb-*".
Twilio Text Message Integration
Back in our post visits handler, hit enter at the end of the line to write more
code (This converts our DB::set action into a statement. Not necessary reading
now, but more on implicit returns is in the
functional aspects of Darklang).
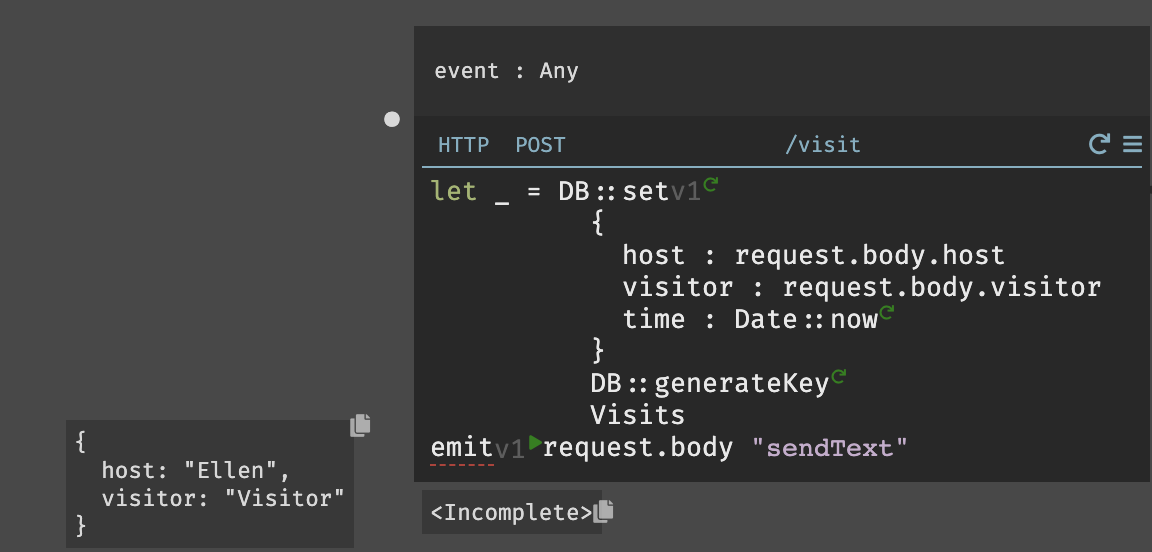
To send information to be used asynchronously (like for API calls) we can use the keyword emit to emit to an async background worker with a queue.
Here, we emit the request.body (seen in a live value on the left) to a worker
named sendText. Hitting play will create a 404 for that worker, much like how
we created our visit and host endpoints.
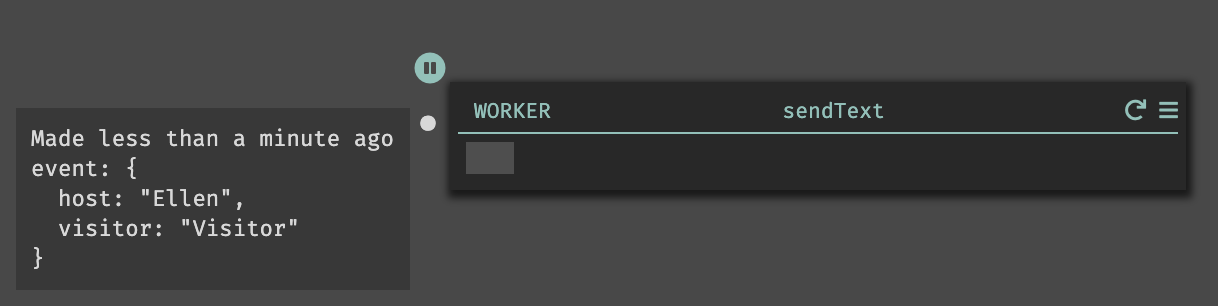
When created, the worker will have the event information as a trace:
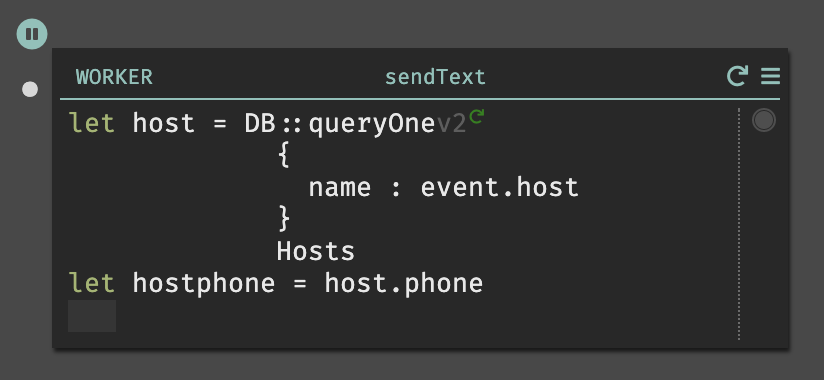
For this worker, we need to get the host’s phone number and then send them a text. This is very similar to the code we wrote before to get the host’s name.
In this case we use DB::queryOne to get only one response, and look by
hostname. Then we can play the query, and make a variable for the field.
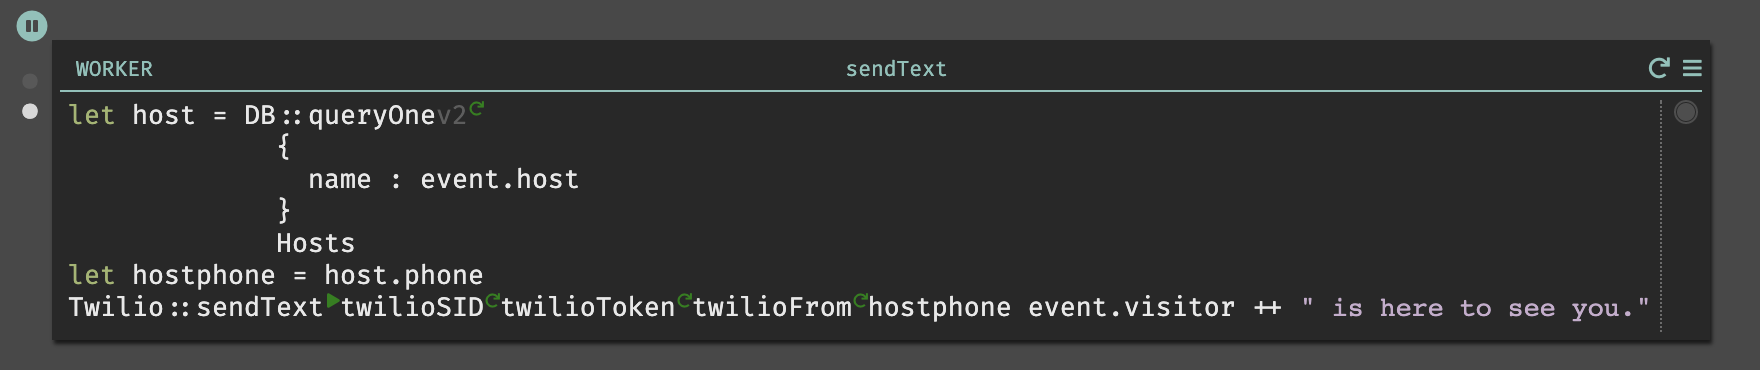
The last step is adding the Twilio::sendText function, which takes five
parameters. The SID, Token, and number you got from Twilio, the
hostphone above, and the message you’d like to send.

When you’ve added yours, it will look like this (but with your tokens).
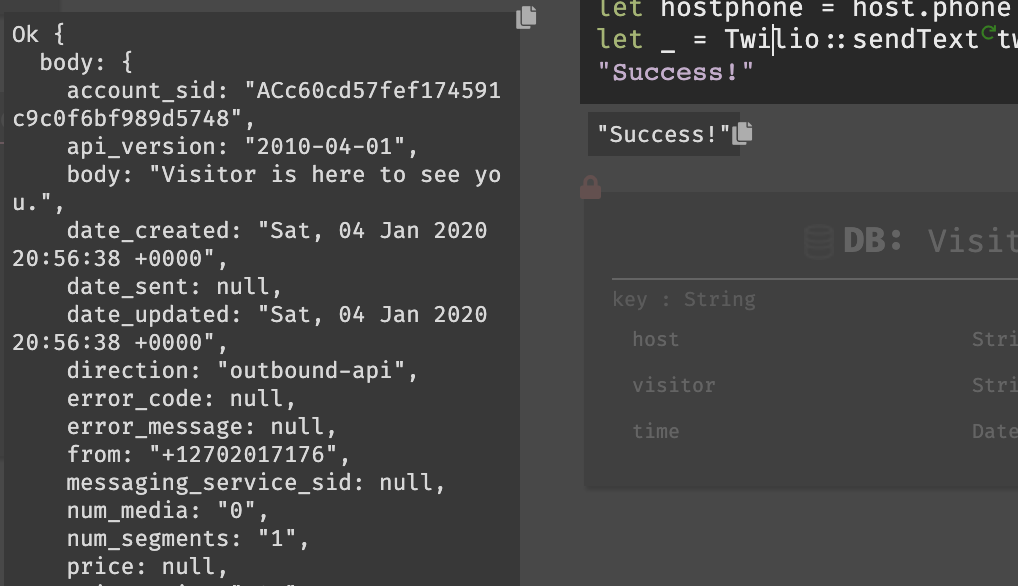
When you hit “play” on sendText, you will be able to see the API response as a
live value, and should receive a text message.
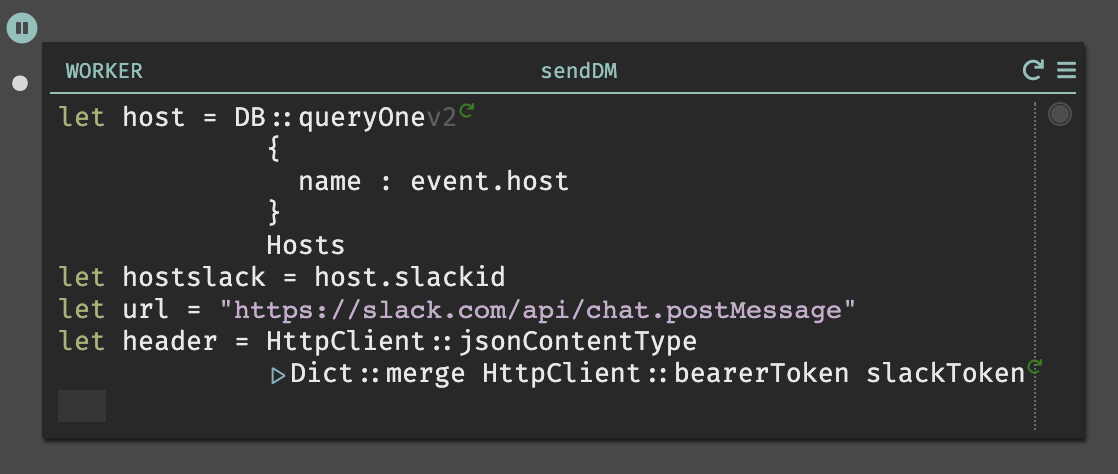
Slack DM Integration
We go back to our /visit endpoint to add the Slack worker. We can even copy
most of the code from the beginning of the Twilio handler to get our Slack ID.

For this, we’ll be using Slack’s
chat.postMessage API method,
which requires the method URL:
https://slack.com/api/chat.postMessage
and pass a header with a content type and a token.
There are built in methods for formatting headers in the HttpClient library.
Finally, we have to make the post request, which takes four parameters, including a body.
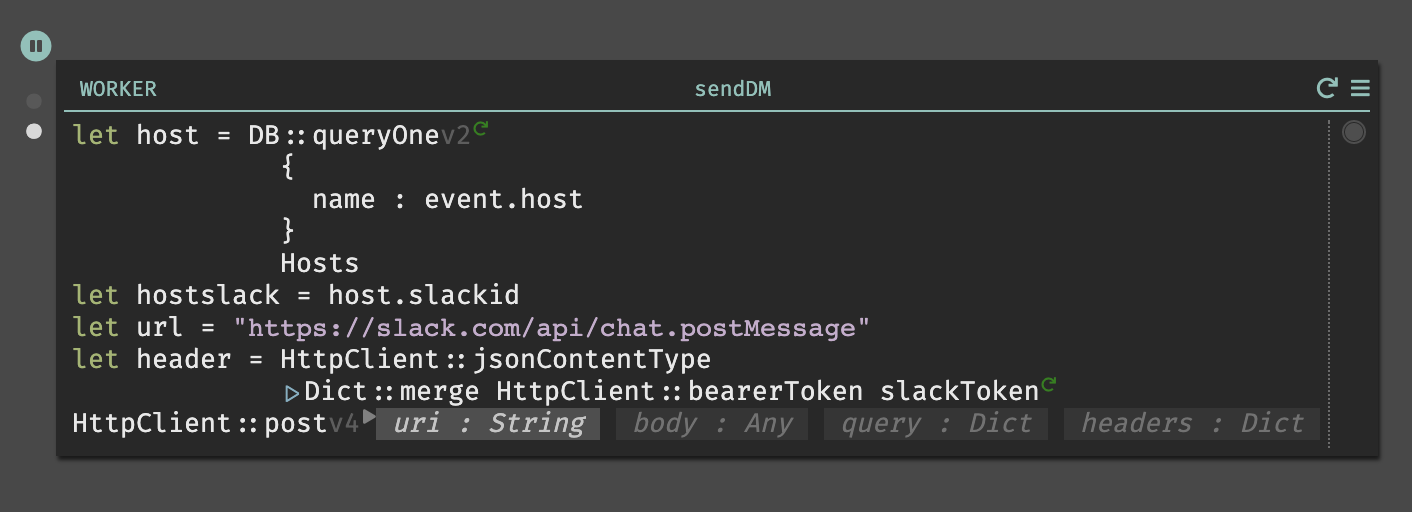
You can fill them in as follows from the above code:
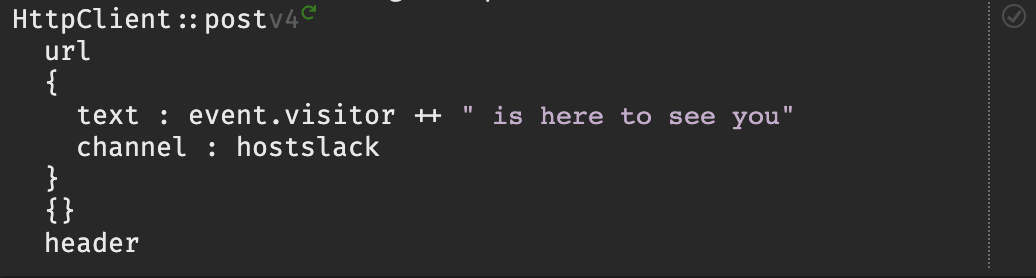
When you hit play, you should receive a DM from your Slackbot, as well as an inline API response.

If it isn’t working, check that all parameters (including {} in the query
field) are correct, and read the API response message to debug.
That’s it!
Now you should have a working React application with an API, persistent data storage, and asynchronous background workers, hosted at [https://username-signin.builtwithdark.com]. When you go back to your React app and submit a new visit, you should receive both a Slack and a Text.
(Interested more in Slack apps? We have a guide for that!)