Walk-through: Send and receive messages
Watch a demo video of building a Slack app.
Getting started
This guide will walk you through how to set up a Slack application, trigger events from it, and write the corresponding backend logic. Our app is for sharing photos of office dogs.
Creating a Slack App
Create a new Slack App from https://api.slack.com/
In order to install the app to your workspace, you’ll need to have the proper permissions. If you can’t, you can set up your own workspace for testing instead. Please don’t use the Darklang community Slack, as it’s a free community and we can’t support them all.
In order to install your app to your workspace, or distribute it elsewhere, your app will need to support at least one feature or functionality.
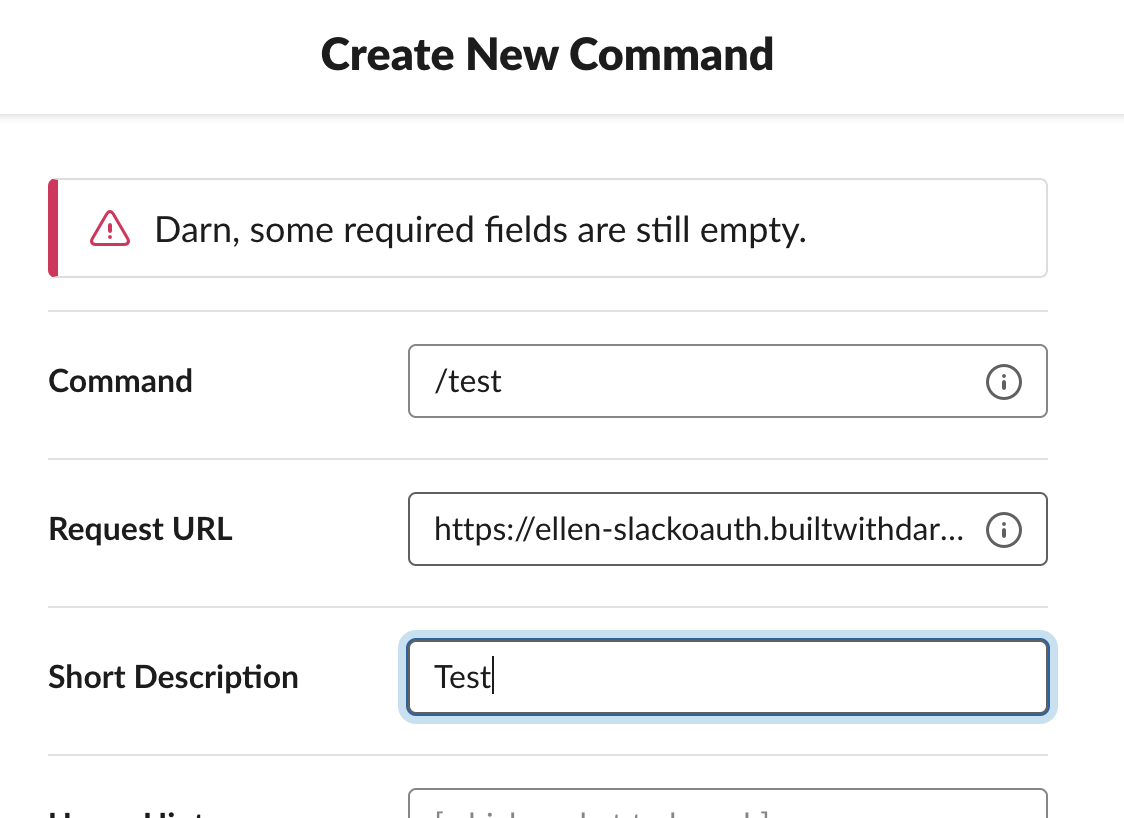
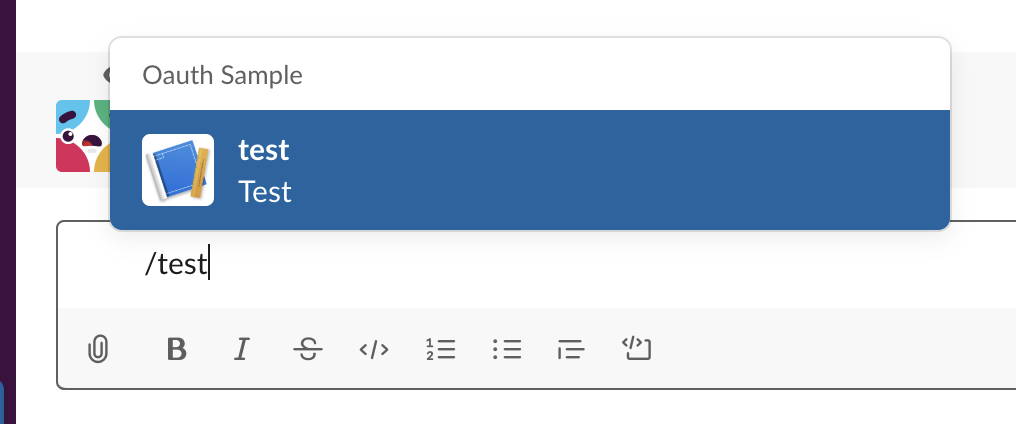
Add a /test slash command to start, and point the request URL at USERNAME-CANVASNAME.builtwithdark.com/test:
(If you’d like, you can add other features & functionality here, like a bot, but this is enough to build the base of the application and get started).
Step One: Setting up OAuth (Relatively Painless!)
In order to allow your app to be distributed, let’s quickly set up OAuth (Slack’s OAuth Documentation).
Manage Distribution. From your Slack App’s Manage Distribution page, add a redirect URL.

The URL you provide will need to be in the following format: [https://USERNAME-CANVASNAME.builtwithdark.com/OAUTH-REDIRECT]
Make sure you click on the option to Save URLs, then navigate to Settings > Manage Distribution and copy the Shareable URL to your browser’s address bar.
--
Before continuing, please visit the Shareable URL to install the application. By visiting this URL, you’re making sure you have a real trace to work from in Darklang. If you’re new to Darklang, Trace driven development is a good overview of why.
--
Once you click on Allow, and then you’ll see a 404 error, since we haven’t written the backend logic.
Go back to your Darklang canvas; we’ll use this 404 to start building.
In Darklang, you work with production traces to build your backend. Click on the “+” next to your 404 to create an HTTP handler that will respond to OAuth requests.

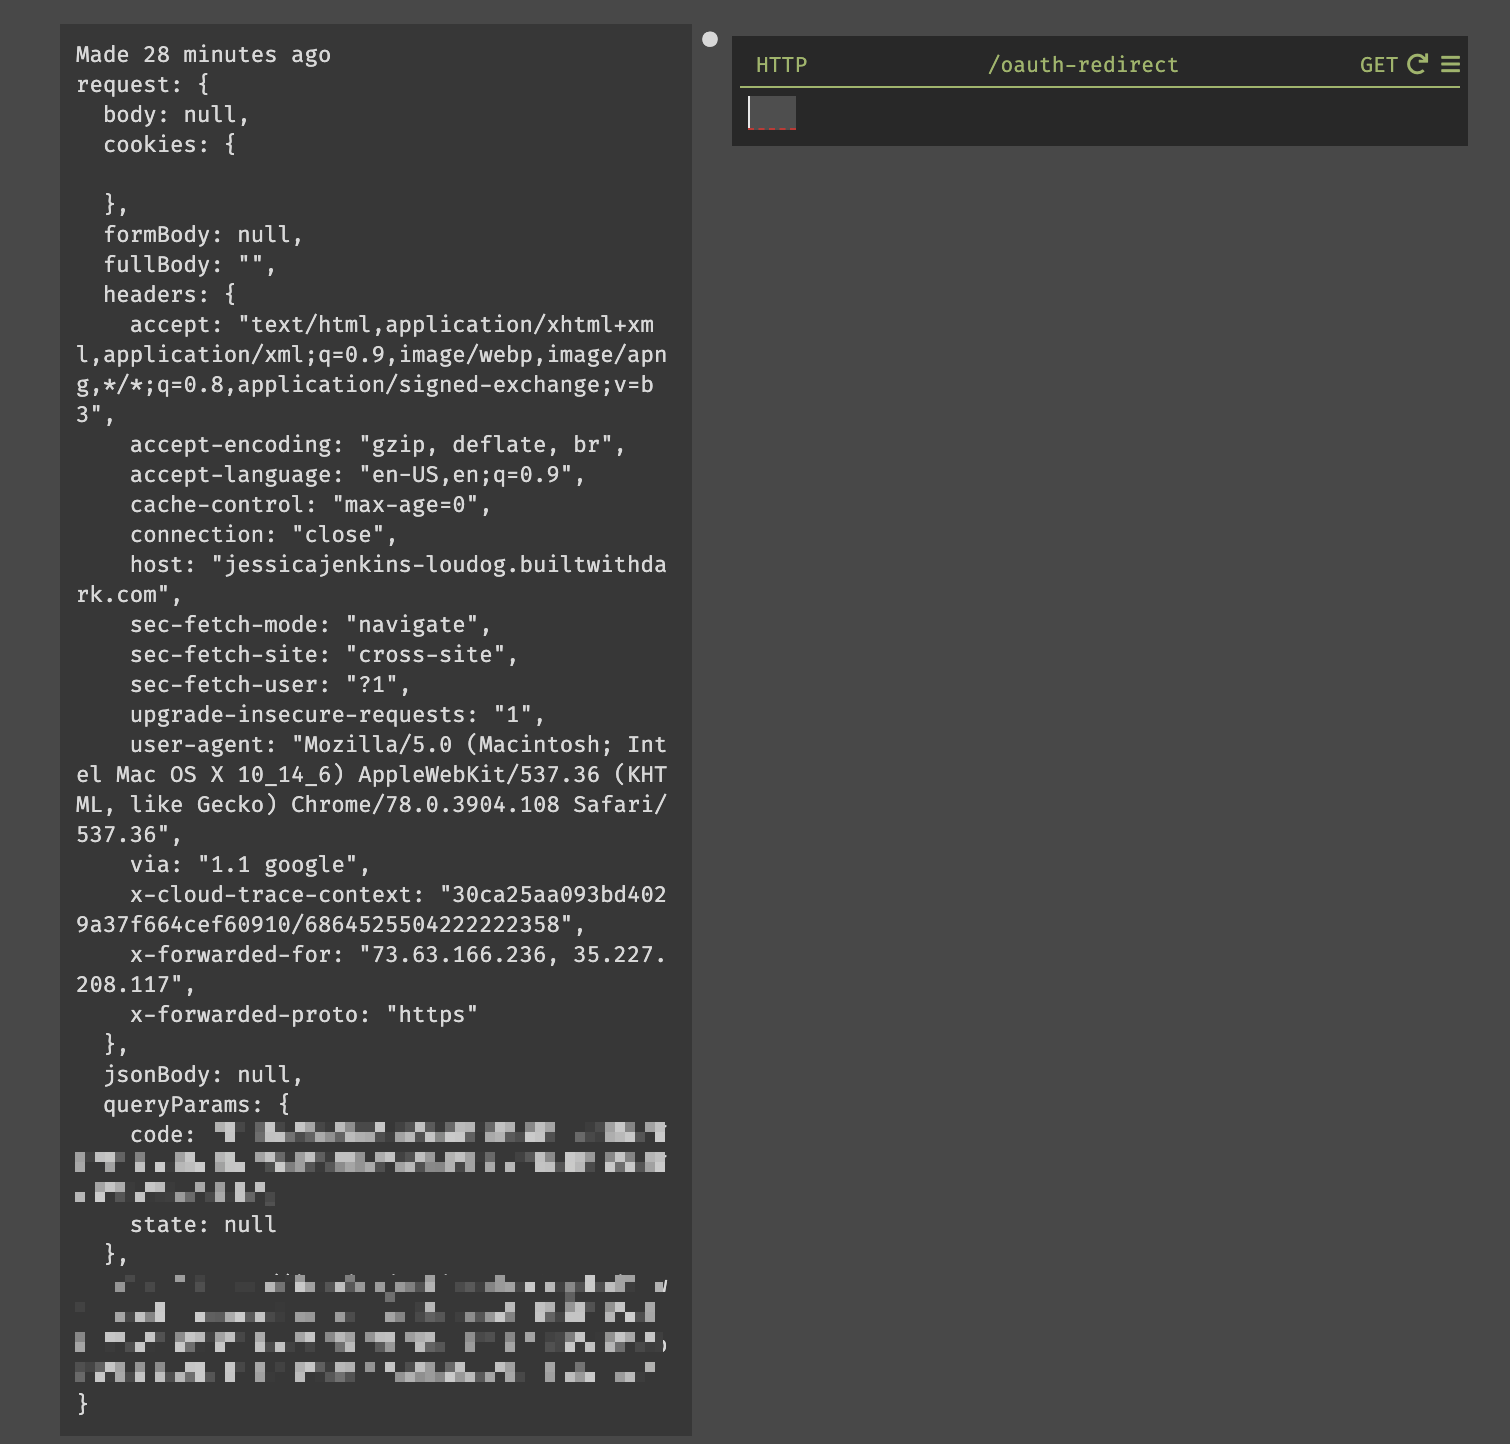
After creating the route, you’ll see the trace showing the full request that Slack made to your Darklang app. This includes the code you’ll need to send back to Slack.
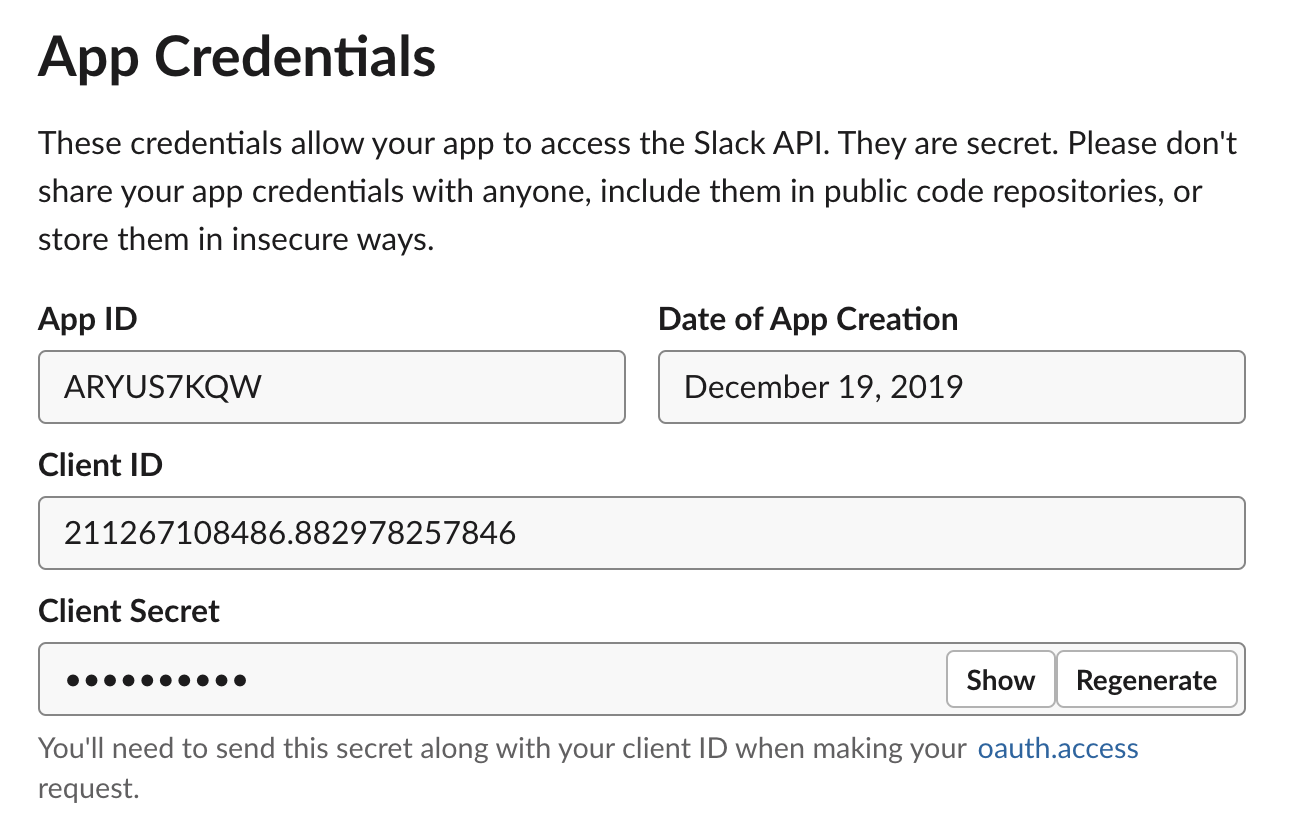
Before we send it, you’ll need your client_id and client_secret, which you
can get from Slack’s Basic Information page.
Type the code below into your handler in Darklang. As you enter it, you’ll see
that the trace is used to show you the results of your code, as well as helping
the autocomplete. When copy/pasting your client_id and secret_id, you’ll
need to open the string literal first (") and then paste (otherwise it looks
like a float and is truncated).
This is the end result, but you’ll see your client_id and client_secret
instead of placeholders:
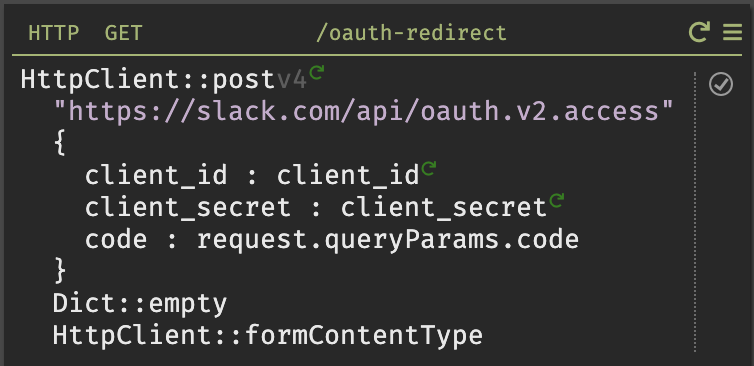
This calls part of Slack’s API
(oauth.access), which will give
you access to the Slack app that requested it.
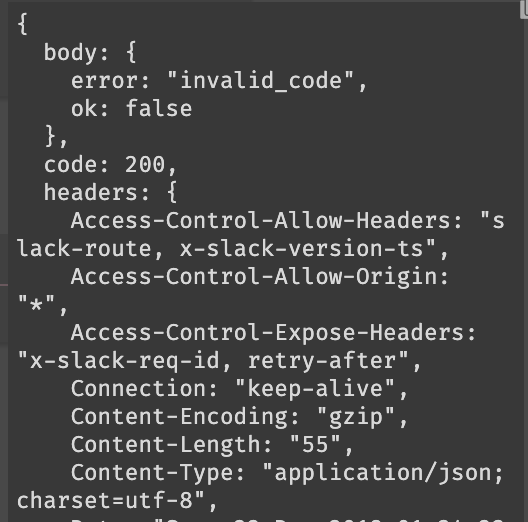
When you’ve done this correctly and hit “play” to make the call
(more on play buttons),
you’ll get a response that has the right fields. This will include team_id and
an access_token. (This may also have a bot_access_token if you add a bot to
your Slack functionality).
If you get an error in a response, you won’t be able to keep going. If the code expired, you’ll need to re-open the shareable link from Slack in the browser to re-authenticate.
You can save the response to a variable by inserting a let (Cmd/Ctrl-\ ->
wrap-in-let). You can also just hit return at the end of the function and it
will do the same thing:
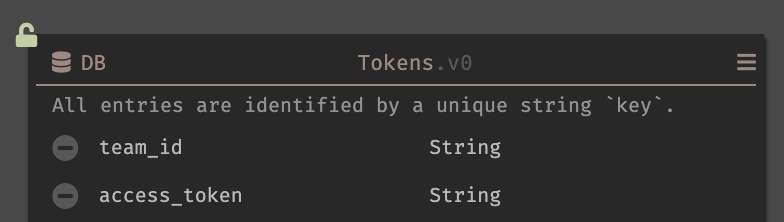
Now save the tokens you receive to a Datastore.
Create a new datastore from the omnibox, and set up a schema that matches the
fields you want to save (in our example for Lou the Dog, team_id and
access_token - depending on your feature set you might not have a
bot_token).
Then, write the following logic to put values in the datastore (this requires a successful exchange of code for token).

Our sample canvas showing this OAuth for Slack can be found here.
Step Two: Building Application Functionality & Working with Slack’s Payload
Now that you’ve installed the app to your workspace, you can build app functionality. We’re not going to go through everything you can do, but rather give you an overview.
Supporting Slack Commands
Slack’s Basic Information page lets you create slash commands, event subscriptions, and interactive components. All three of these options require a Request URL, which is just a URL pointing to your Darklang app, in the same format as before:
[https://USERNAME-CANVASNAME.builtwithdark.com/ROUTE]
Trigger one of these routes, and then use the 404 and trace to build out the functionality, in the same way you did with OAuth.
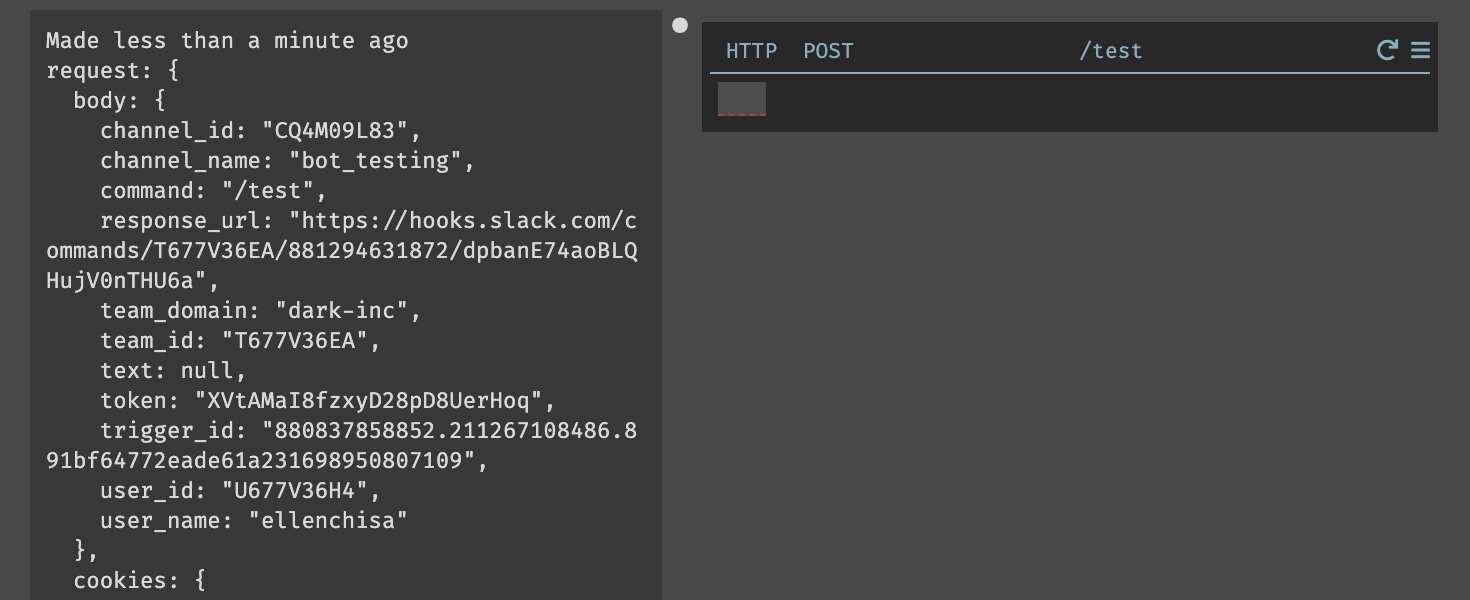
For instance, if you used the sample slash command, /test, you’d get this result after triggering it in Slack (and it would appear in your 404 section in Darklang).

When you create the endpoint from the 404 section, you’ll be able to work with the trace:
Supporting Bots & Event Subscriptions
You can set up a bot that listens for its name by adding
app_mention under Subscribe to bot
events in Features > Event Subscriptions.
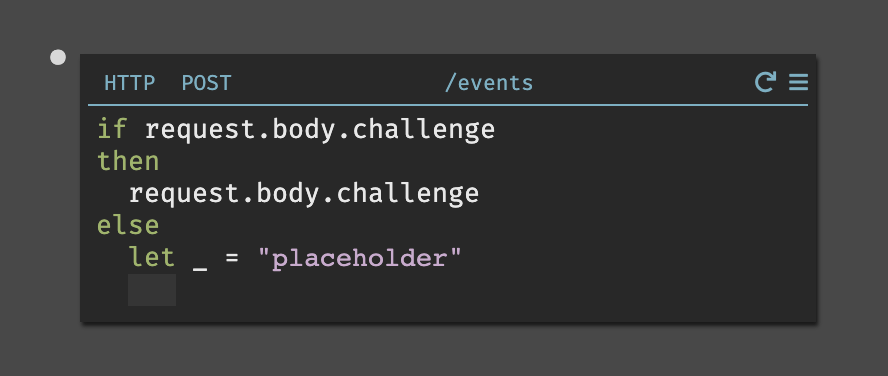
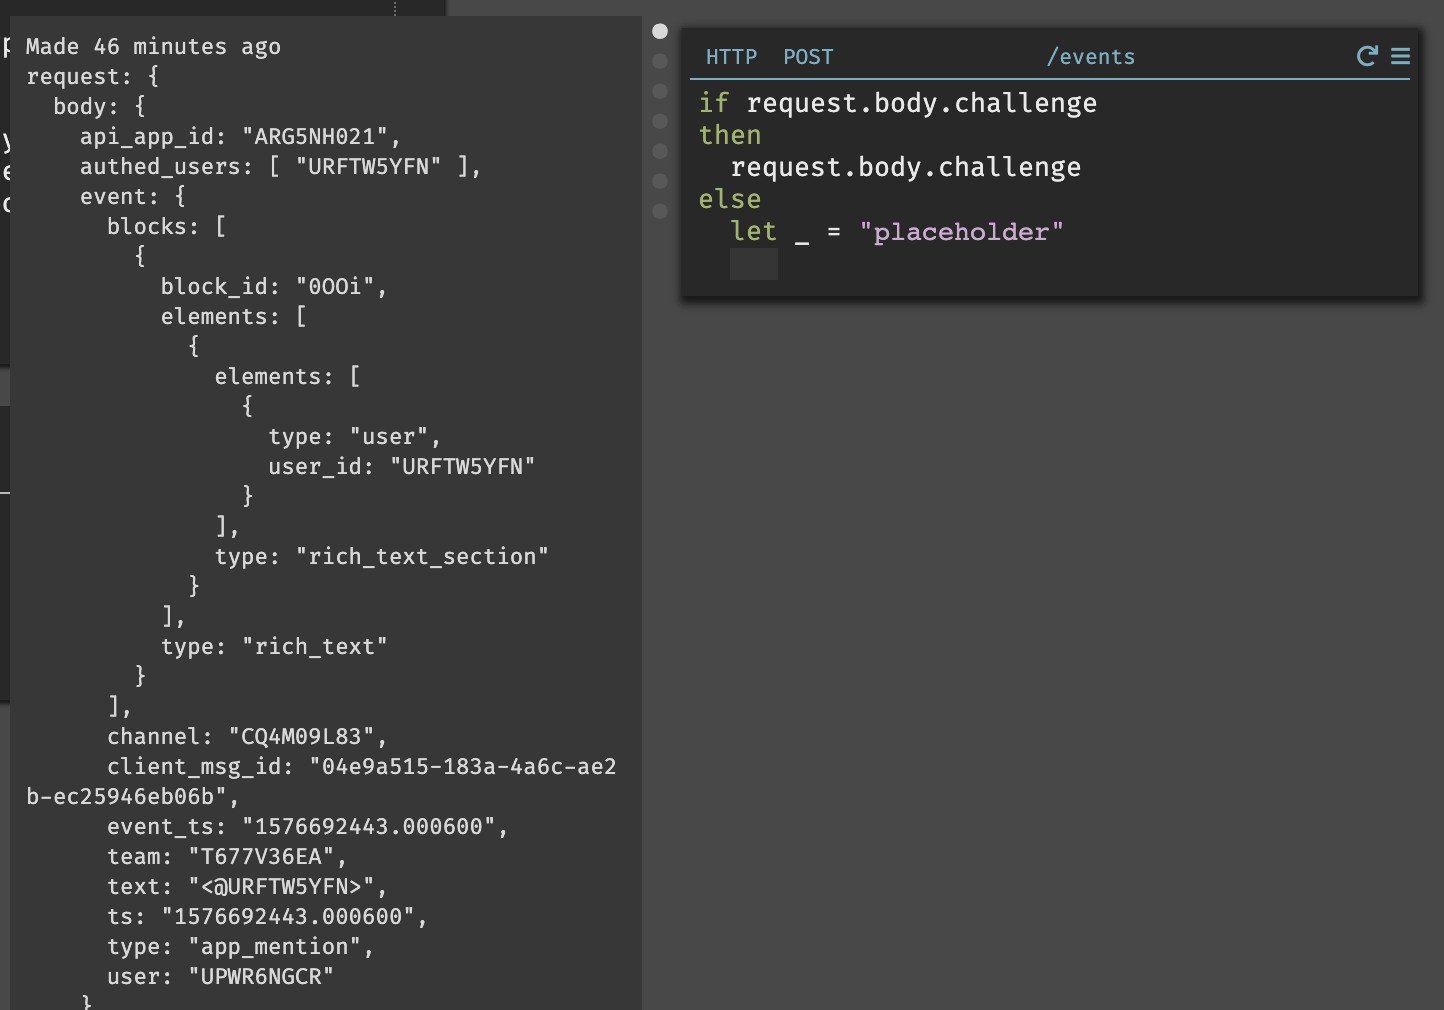
The command will be sent to the URL you specify and, like OAuth, the route will show up in your 404s. Event subscriptions require that you respond with a challenge parameter to validate the URL that handles that interactivity. This challenge is only sent once, but you can wrap the challenge response in an if/else in the event that you need to validate this URL again:
Handling Incoming Data
Once you’ve set up your request URL or event subscription, you’ll be able to receive and work with incoming requests.
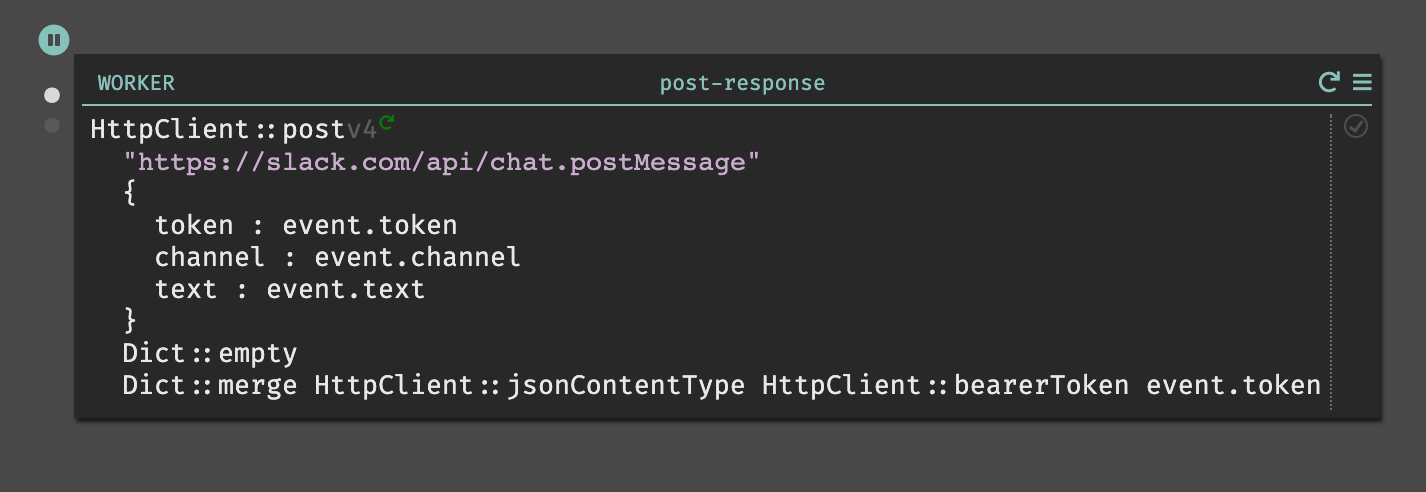
As before, use the trace to extract the values you’ll need to post your response.
So far, we’ve typically posted a message to Slack directly from an HTTP handler. However, it’s better practice to do this using background workers when posting to external API endpoints. Workers respond to events asynchronously, and queue events if they fail. You can use emit to trigger a worker, and when you hit play, you’ll see the worker appear in your 404s. Here is the full events handler:

We’ll use Slack’s
postMessage method to
respond to a direct mention with a message in Slack, and write the code to post
the response in our worker:
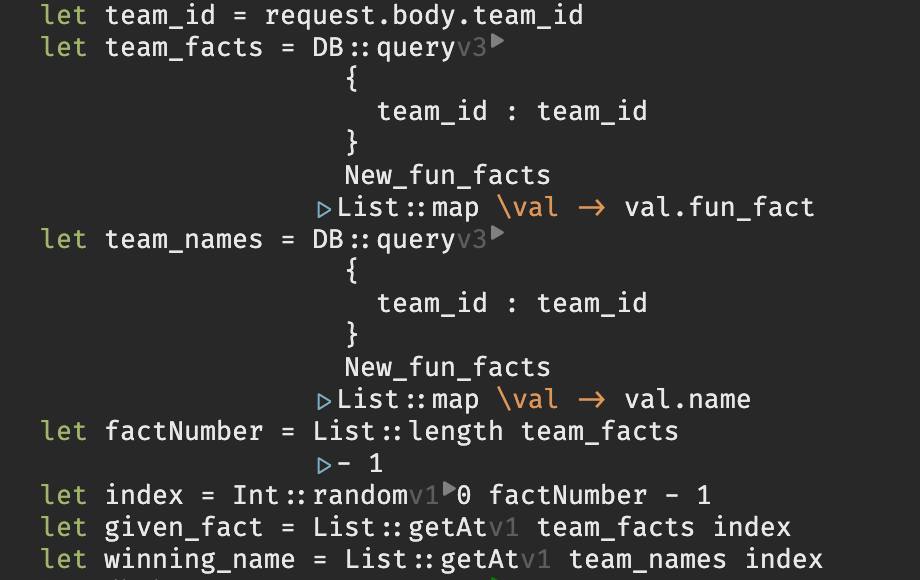
If you want to support interactivity that involves working with buttons, menus, or fields within a modal, this may change the shape of Slack’s payload into a string with nested lists. There are several functions you can use that will help with data wrangling in those cases:
JSON::parse- Parses a JSON string and returns its value.Lambda(or\) - for creating anonymous functions that are most helpful when iterating through lists|>(or shift+enter) - to pipe into another expressionList::getAt- For when you know the index of the nested list that contains your value.
Here is an example of where most of these functions are used to extract the right values and to help draft a reply: