Walk-through: Create a New Trello Card from Slack
Connecting your Trello account with your Slack account can make for a powerful tool - no more switching tabs and hunting for the right Trello list when you want to capture the excellent idea that just came up. In this tutorial, we'll show you a few ways to enable your team to create new Trello cards directly from Slack.
Trello Configuration
For this tutorial, you're going to need to grab a few different things from Trello and store each of them as separate functions in Darklang:
- Your Trello API Key and Token, available on this page after logging in
- Your Trello org id, the id for one of your boards, and the id for one of your
lists, which we will refer to as our
defaultListIDthroughout the tutorial. The best way to get all of these at once is to add.jsonto the end of the URL on one of your boards, and search through the resulting JSON for theidthat matches with the name of your board, theidthat matches with the name of the list you'd like to use andidOrganization. Don't worry - we'll cover an easier way to handle this later in the tutorial.
Slack Configuration
-
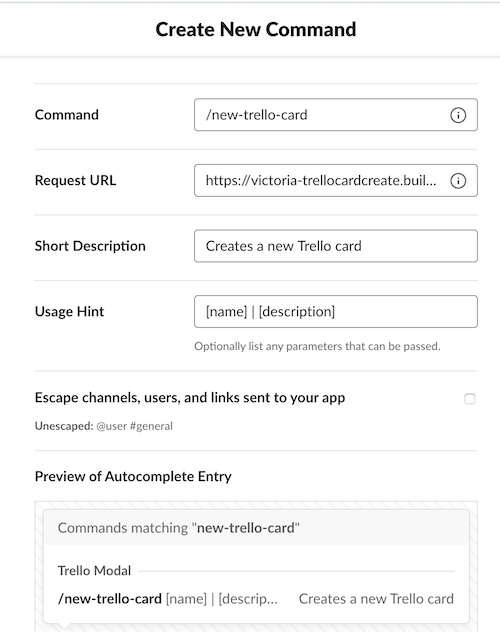
Set a Slash command (the option should appear under Add features & functionality on your app's main page). Your
Request URLshould look something likehttps://yourusername-yourcanvasname.builtwithdark.com/new-trello-card. This is the URL that Slack will call when you use your slash command - don't add anything to your Darklang canvas just yet. Also note our usage hint - a card name and card description, separated by a|symbol.
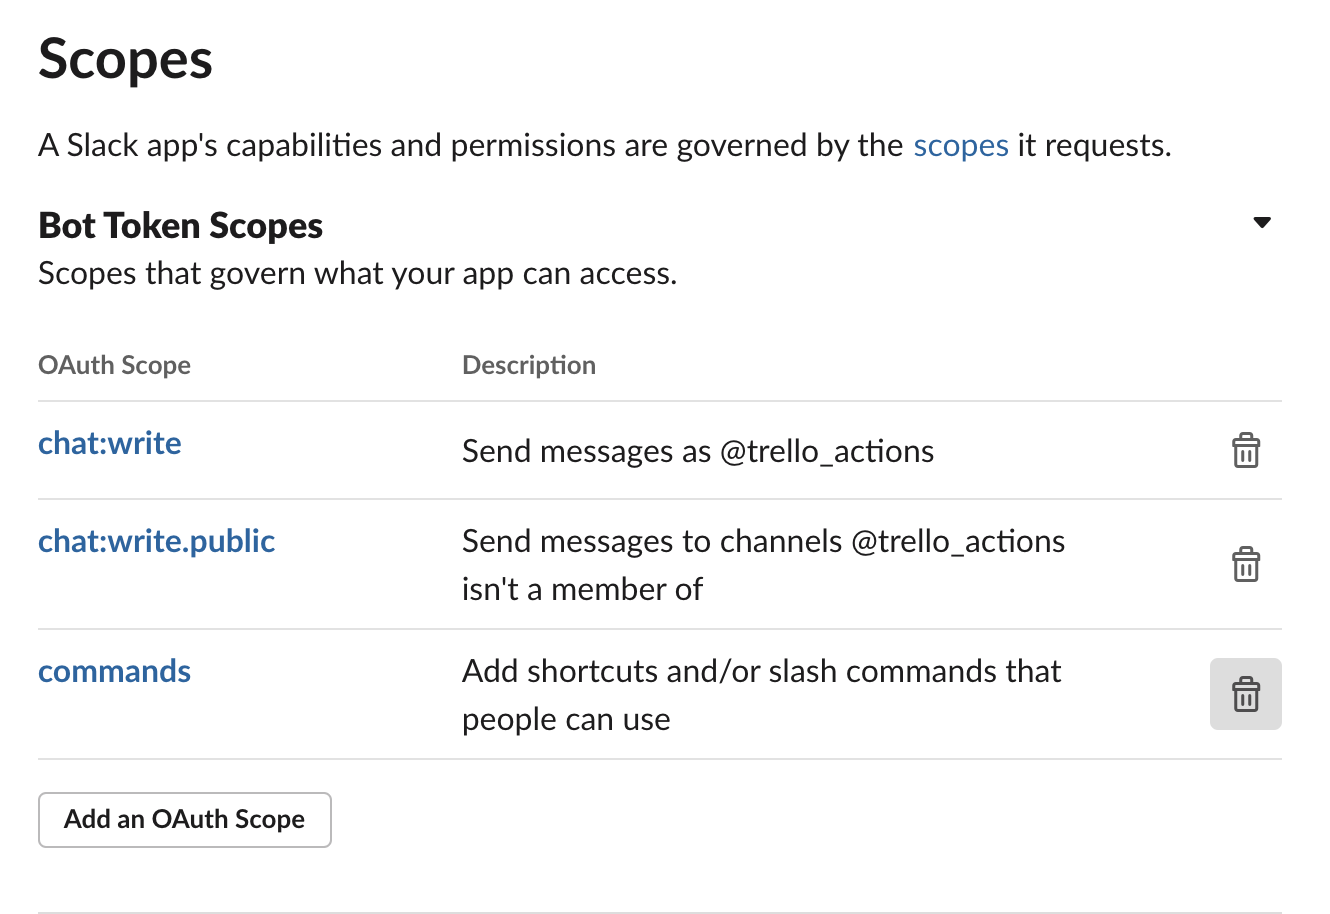
- Add the following scopes to your app:
chat:write,chat:write.public,commands.
-
Install your app to the workspace (either via Settings -> Basic Information or Settings -> Install App). Since this app is being built for your workspace specifically, we will not need to set up full OAuth, like we would if we wanted to distribute this more publicly.
-
Copy your bot user access token, which will now be available under Settings -> Install app and save it as a function in your Darklang canvas. Use this function wherever you see
slackTokenin the code examples.
Building in Darklang
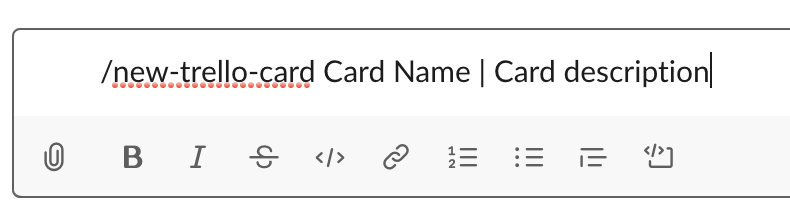
- Attempt to use your slash command. Make sure to include some text after your slash command, separated by a | symbol.

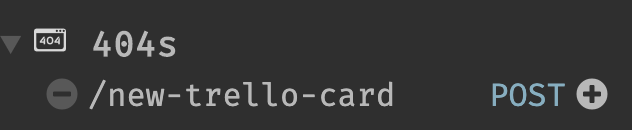
- Navigate to your Darklang canvas and check the 404s section in the sidebar -
you should see an HTTP POST created called
/new-trello-card(or whatever you used when setting up your slash command). Click the plus sign to add it to your canvas.
- Once it's on your canvas, you can place your carat over the trace on the left (the white dot) to see the incoming data Slack attempted to send.

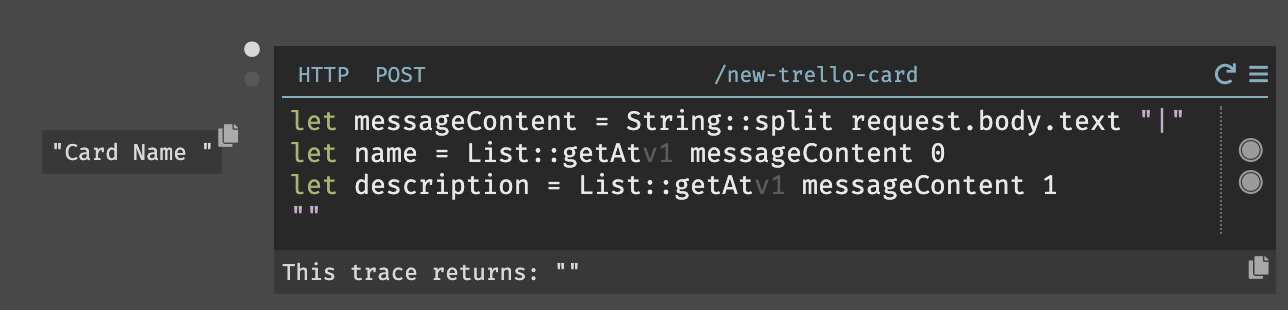
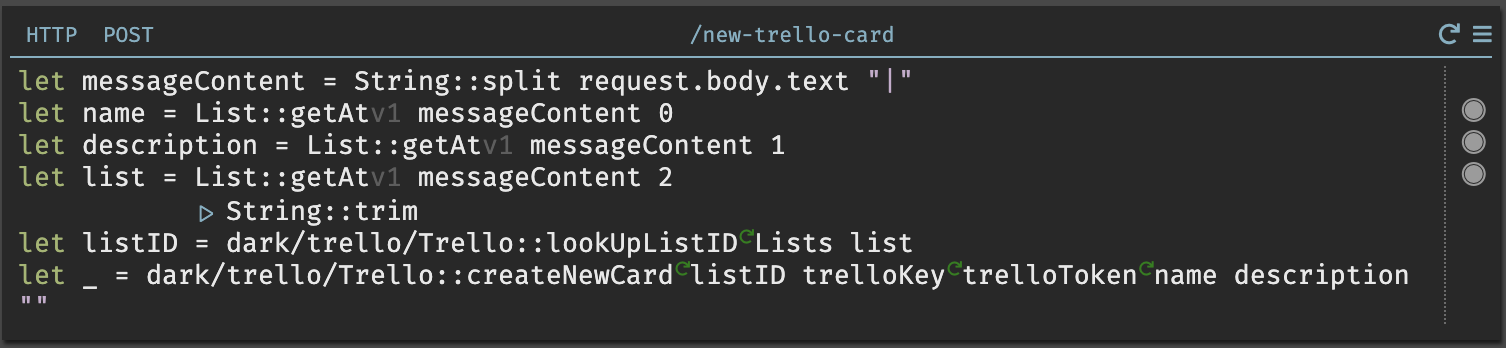
- In the body of your trace data, you will see a text field in the body. This
is what we want to parse to get the name and description of the card we're
going to create. In order to parse this information, we're going to use
String::splitand parse on the special character|.

- Now that we have a list of
messageContent, we can useList::getAtto set the name and description of the card.
- Once we have all of the information we need, we can use the Darklang package
manager
Trello::createNewCardfunction to create the new card. For simplicity's sake, we're going to use thedefaultListIDwe set earlier, as well as thetrelloKeyandtrelloToken.

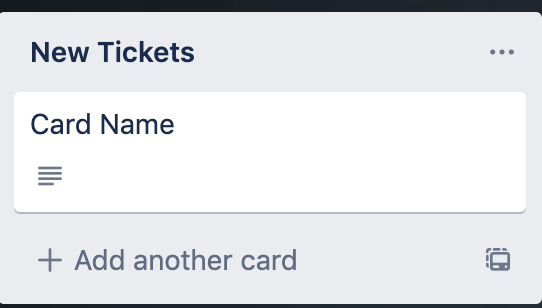
- Re-run your HTTP handler, or call the slash command again and then check Trello - your new card will have been created in the list you specified.
Handling Lists
In the future, you probably won't want to worry about hunting around for your list ids. We've made it easy for you to create your own lookup table to match list names and ids.
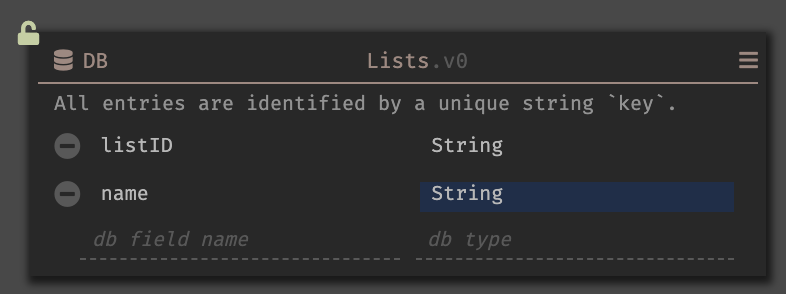
- Create a
Listsdb.
- Now, we can use built in Darklang package manager functions to get a list of
all of our Trello lists and add them to our DB. Create a REPL called
addListsToDB, add the following lines of code, and run it:

- Let's try another slash command, this time with more information - specifying the name of a list to add the card to.
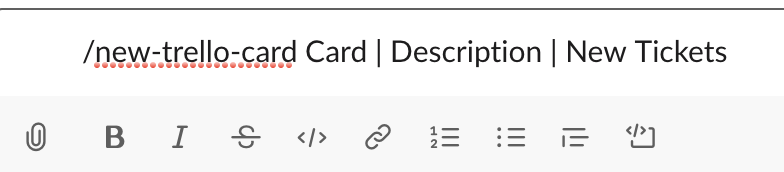
- Now
messageContentwill have a third entry in the list.

- Using the built in
Trello:lookUpListIDfunction, we can grab the name of that list and use it in ourcreateNewCardfunction.
Making input easier with modals
Okay, this is all great, but still has some problems. What if someone forgets to add the right special character? Let's make it a little easier, by creating a modal to handle their input.
-
Create a new slash command, just as we did at the beginning but with a different name and Request URL. This allows us to build different functionality around this command without losing anything we did previously. I used
/new-trello-card-modal. -
Turn Interactivity on via Features -> Interactivity and Shortcuts and specify a URL for the interaction to be sent to:

-
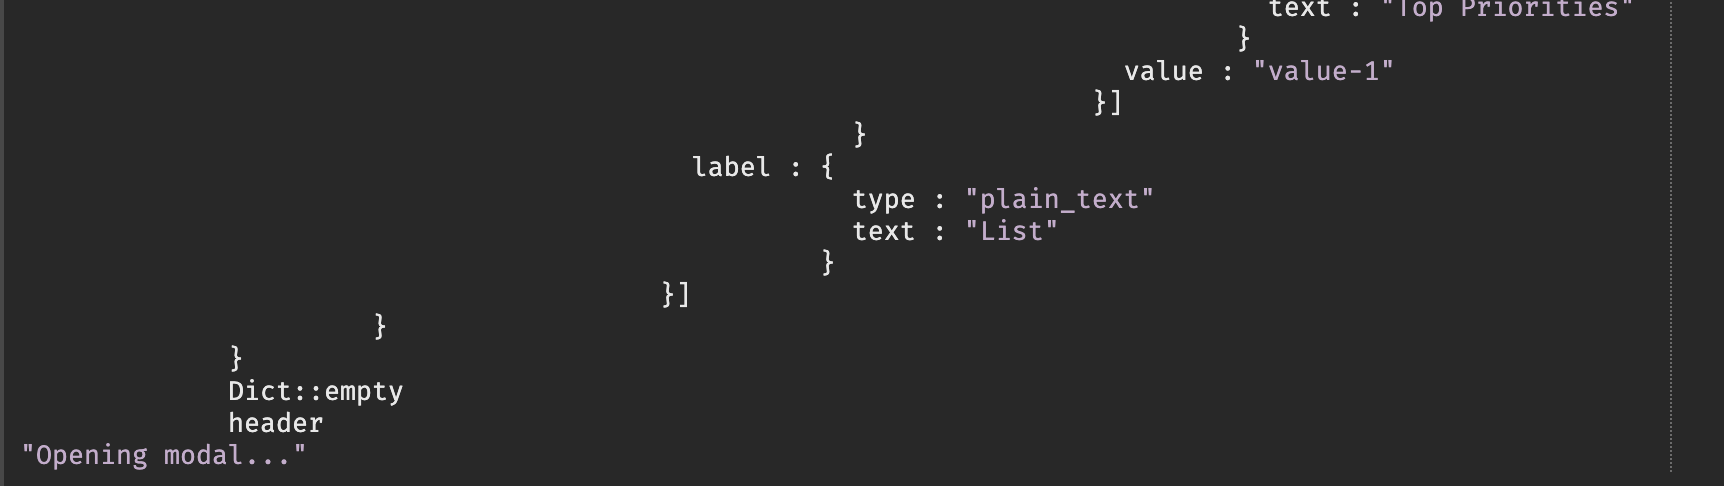
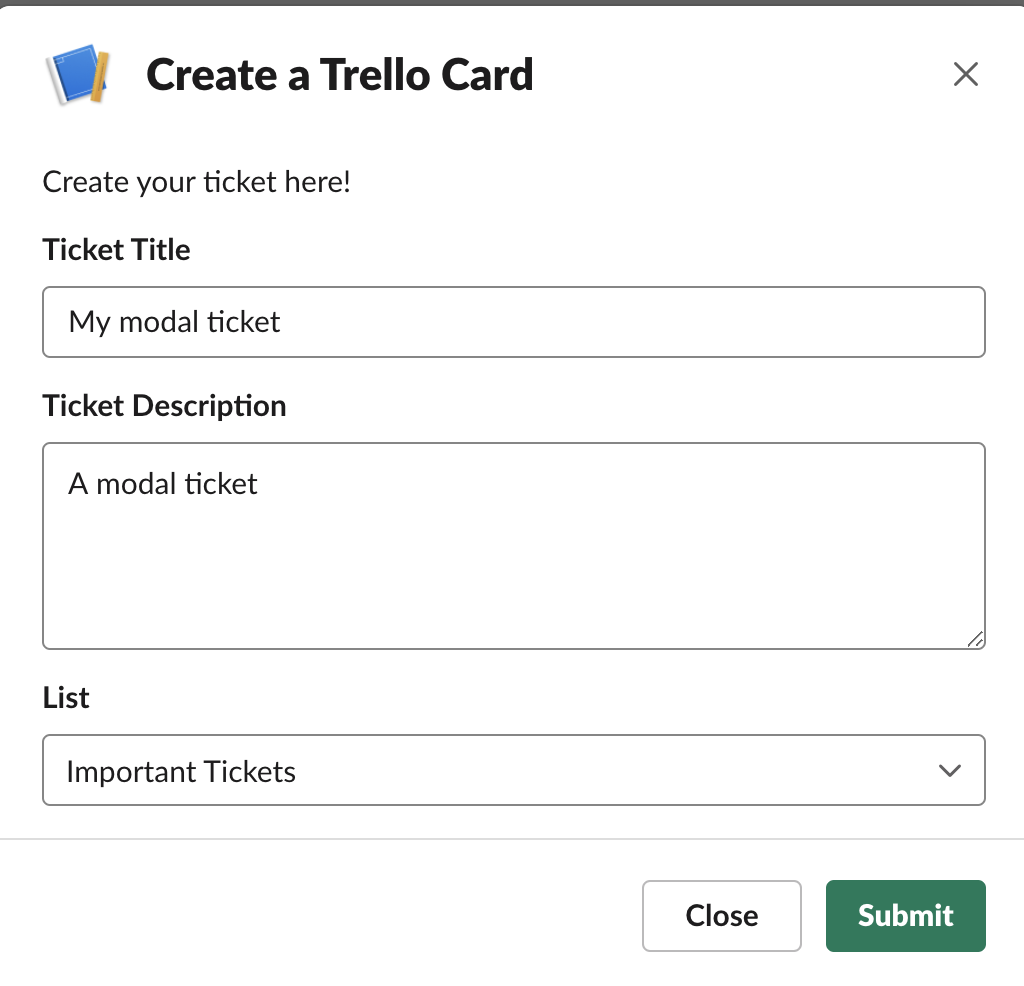
Slack uses JSON to generate modals via a framework called Block Kit, even providing a handy Block Kit builder. At this point, it may make sense to pause and create your modal - we'll need the JSON soon. The modal we're going to use has 3 fields: a single line for the card name, a multiline for the card description and a select for a list of lists.
-
Now, just like before, we're going to call the Slash command and grab the 404.

- Grab your
trigger_idfrom therequest.body:

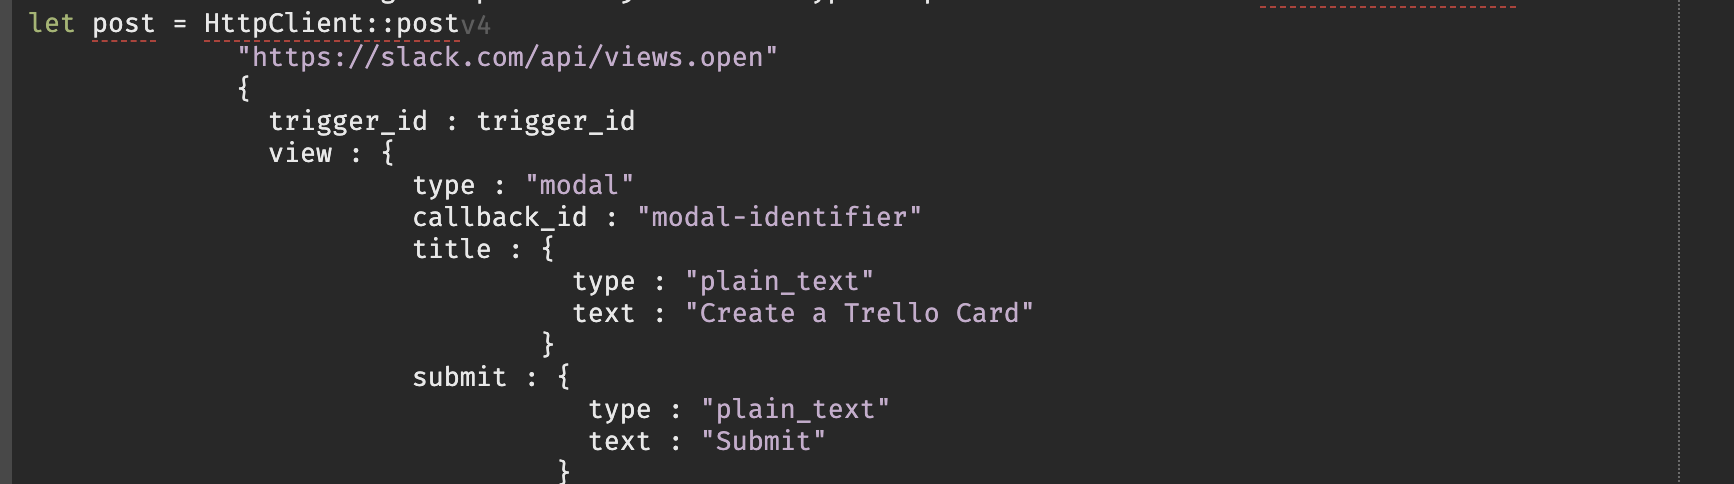
- Create an
HttpClient::postrequest and add yourtrigger_idandJSON. These are truncated screenshots with a lot of the JSON cut out:
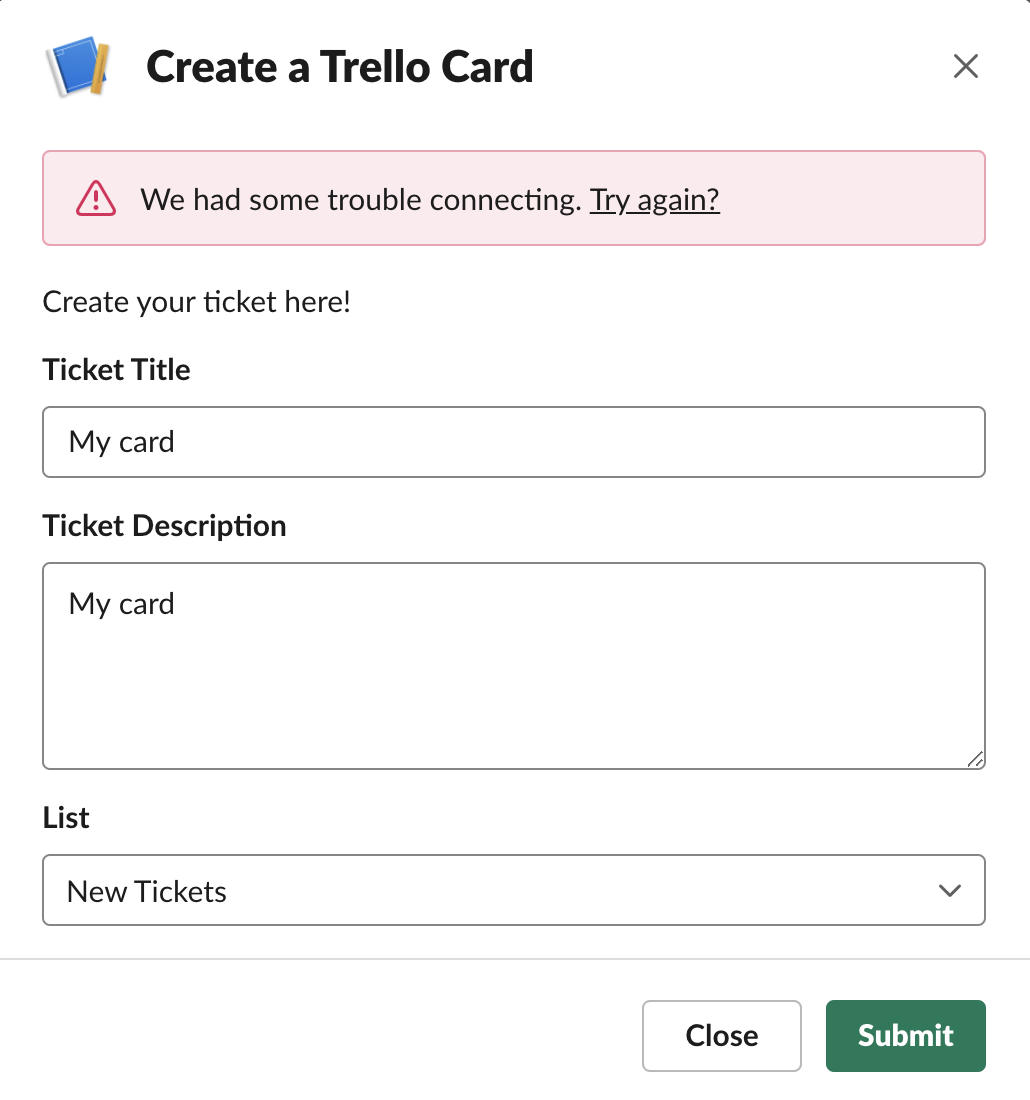
- Try your Slash command - a modal should open. Input text and try to send. You will get an error message:
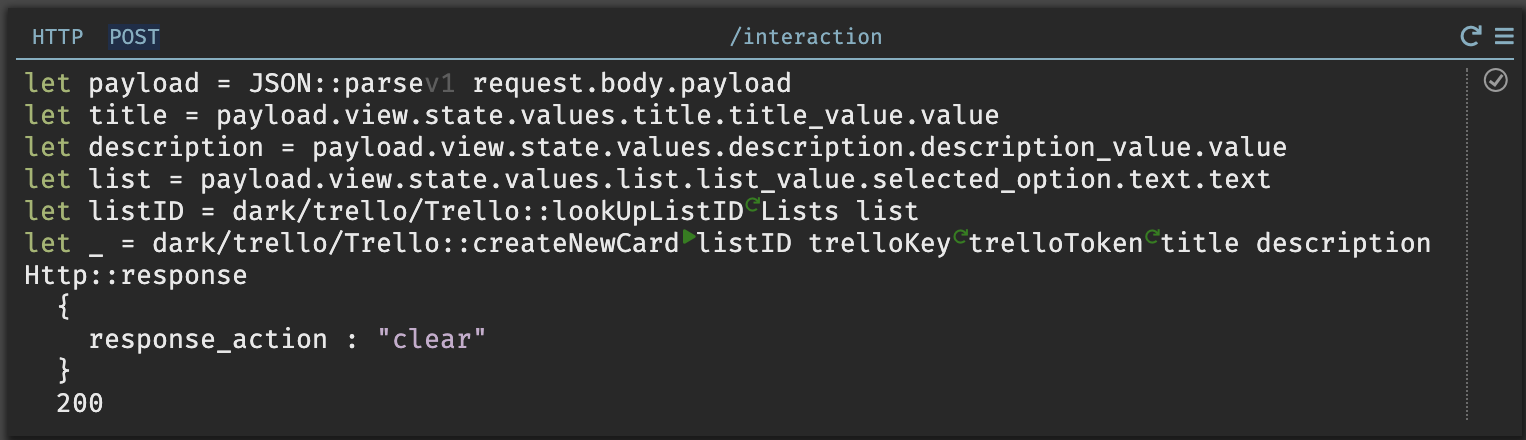
- We need to work with our
/interactionhandler, which should be available in your 404s. We're going to start with parsing the payload Slack sent through:

- We can use that payload to grab the information that you submitted in your modal:

- And, just like before, we'll use the
Trello::lookUpListIDto find the correct Trello list:

- All that's left is creating the new card and sending a 200 response back to Slack:
- Try to create a ticket again with your Slash command:
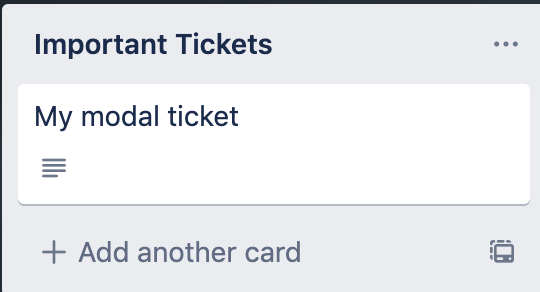
- Once you hit submit, your ticket will appear in Trello!
Congratulations, you now have a Slack app that can create Trello cards in multiple ways!